Small Trees That Add Tropical Flair Indoors

Small Trees That Add Tropical Flair Indoors

Bringing tropical flair indoors has become one of the hottest trends in modern interior design. Tropical small trees not only create a lush, exotic vibe but also purify the air, improve mood, and serve as natural décor. For homeowners, apartment dwellers, and plant enthusiasts, these trees are the ultimate way to blend functionality with style. Unlike giant palms or full-sized tropical species that require massive space, small tropical trees thrive in containers and can easily be integrated into living rooms, offices, and even bedrooms.

This article explores the best small trees that bring a tropical touch indoors, their benefits, care tips, and how to style them to transform your home into a mini tropical oasis.


Why Choose Tropical Small Trees for Indoors?

Tropical plants have long been admired for their bold leaves, vibrant flowers, and exotic presence. Here’s why they make excellent indoor choices:

  1. Exotic Aesthetic – Their broad foliage and striking colors instantly add a tropical vibe to any interior.
  2. Compact Growth – Many tropical trees can be kept at manageable sizes through pruning or by choosing dwarf varieties.
  3. Year-Round Greenery – These trees thrive indoors with consistent care, offering greenery even during harsh winters.
  4. Health Benefits – Tropical trees improve air quality by filtering toxins and adding humidity.
  5. Stress Relief – Studies suggest exposure to lush green plants reduces stress and enhances relaxation—perfect for modern homes.

Factors to Consider Before Growing Tropical Trees Indoors

Before diving into specific trees, keep these points in mind:

  • Light Needs: Most tropical species need bright, indirect sunlight.
  • Humidity: Tropical trees thrive in humid conditions; misting or using humidifiers may be required.
  • Container Choice: Use pots with drainage holes to prevent root rot.
  • Soil: Well-draining, organic-rich soil helps replicate their native environments.
  • Temperature: Keep trees away from drafts, heaters, or air conditioners that cause stress.

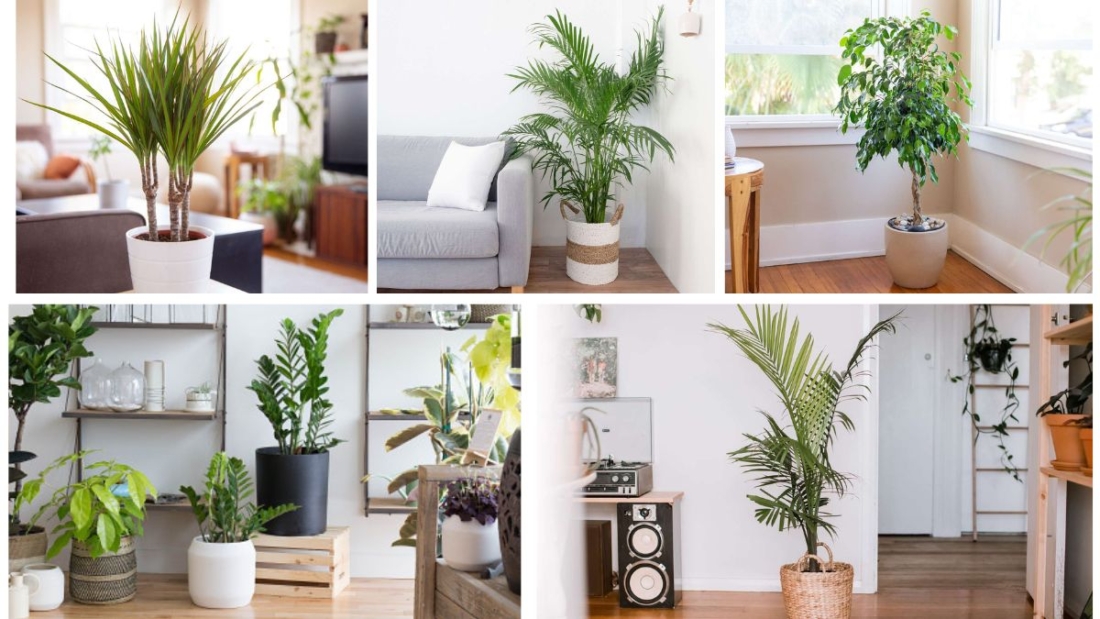
Best Small Tropical Trees for Indoors

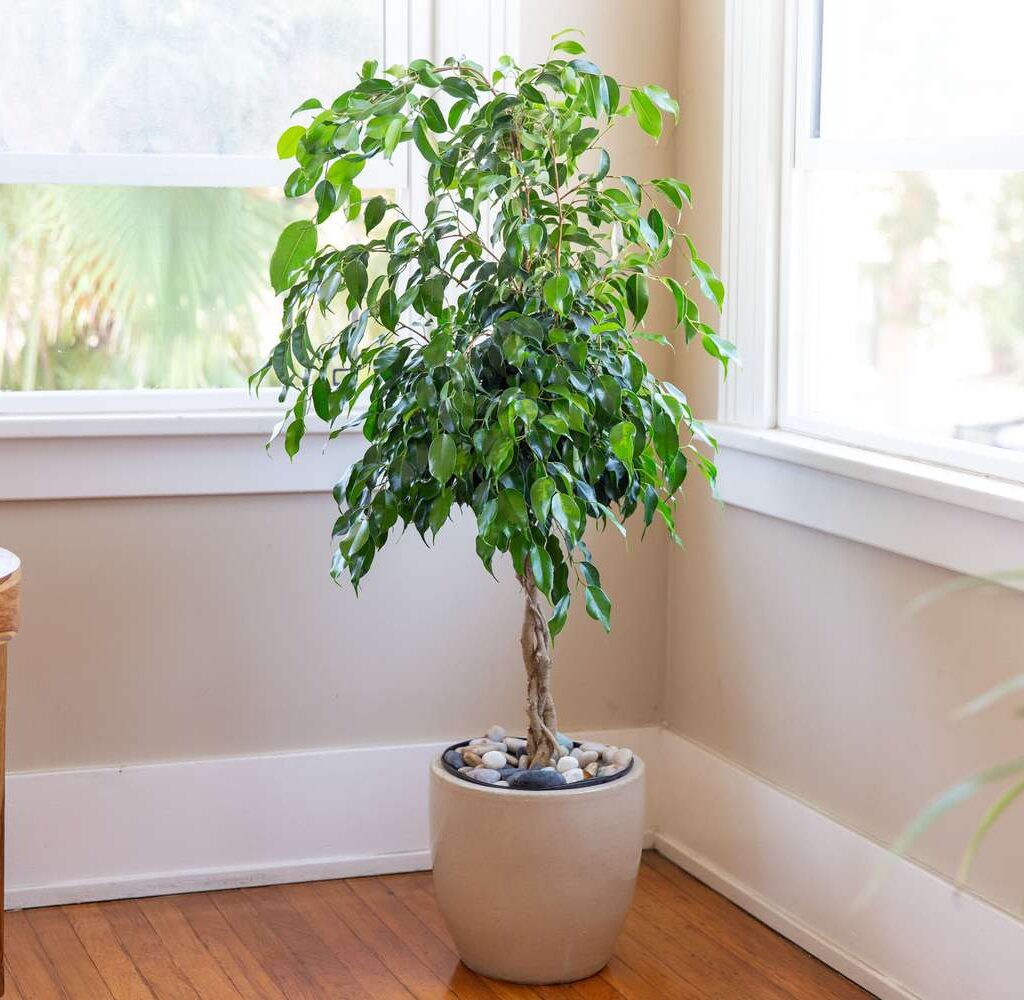
1. Fiddle Leaf Fig (Ficus lyrata)

A modern favorite, the fiddle leaf fig is instantly recognizable for its large, violin-shaped leaves. While it can grow tall outdoors, indoor potted versions remain compact, usually between 4–6 feet.

  • Care Needs: Prefers bright, indirect light and consistent watering (but avoid soggy soil). Rotate regularly for even growth.
  • Tropical Flair: Its bold leaves make a dramatic statement in minimalistic or modern interiors.
  • Styling Tip: Place in a woven basket or sleek ceramic pot to highlight its sculptural beauty.

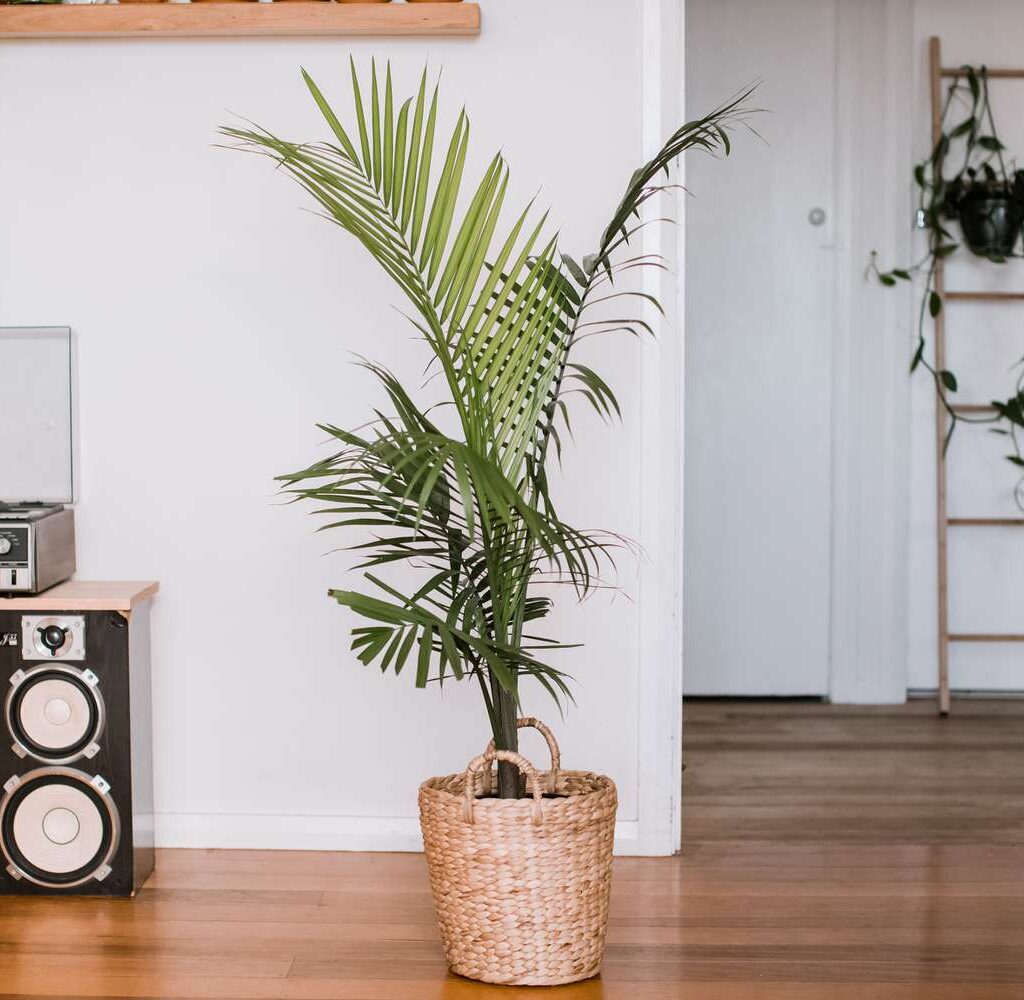
2. Areca Palm (Dypsis lutescens)

Also known as the butterfly palm, this small tree has feathery fronds that bring instant tropical vibes indoors. It’s a natural humidifier, releasing moisture into the air.

  • Care Needs: Bright, filtered light and frequent watering. Keep soil slightly moist.
  • Tropical Flair: Its clumping stems and arching fronds resemble a mini palm grove.
  • Styling Tip: Perfect for corners of living rooms or office spaces for a lush, green backdrop.

3. Banana Plant (Musa spp.)

Banana plants bring a bold tropical statement indoors with their enormous paddle-shaped leaves. While fruiting indoors is rare, the foliage alone provides an authentic jungle look.

  • Care Needs: Requires plenty of sunlight, high humidity, and consistent watering.
  • Tropical Flair: Few plants can rival the dramatic effect of its oversized leaves.
  • Styling Tip: Works well as a centerpiece in bright rooms or sunrooms.

4. Bird of Paradise (Strelitzia reginae)

The bird of paradise tree is admired for both its large banana-like leaves and its exotic, crane-shaped flowers. Indoors, it grows up to 6 feet, providing a striking presence.

  • Care Needs: Full sun to bright indirect light; needs consistent watering and occasional feeding.
  • Tropical Flair: Its flowers, when they bloom, are a showstopper with vibrant orange and blue petals.
  • Styling Tip: Use in a minimalist room to let its dramatic leaves take center stage.

5. Dwarf Umbrella Tree (Schefflera arboricola)

This compact tree has glossy, umbrella-like leaves arranged in clusters, adding a cheerful tropical touch indoors. Variegated varieties bring extra color.

  • Care Needs: Tolerates medium light but thrives in bright indirect light. Water moderately.
  • Tropical Flair: Its leaf patterns create a playful, airy vibe.
  • Styling Tip: Great for office corners or as a desk-side tree.

6. Money Tree (Pachira aquatica)

Known for its braided trunk and lush leaves, the money tree is often associated with prosperity and good luck. Its unique appearance makes it one of the most popular indoor tropical trees.

  • Care Needs: Thrives in bright, indirect light; prefers moderate watering. Avoid overwatering.
  • Tropical Flair: Braided stems with dense foliage add elegance and a touch of feng shui.
  • Styling Tip: Place in a decorative pot near entryways for both beauty and symbolism.

7. Parlor Palm (Chamaedorea elegans)

A classic Victorian-era houseplant, the parlor palm thrives in low light and adds soft tropical greenery without overwhelming small spaces.

  • Care Needs: Tolerates low light; requires occasional watering. Very low-maintenance.
  • Tropical Flair: Its slender stems and gentle fronds create a delicate, airy tropical feel.
  • Styling Tip: Ideal for bedrooms, hallways, or dim corners.

8. Guava Tree (Psidium guajava)

For those who want both tropical flair and edible fruit, the guava tree is a fantastic choice. Dwarf varieties stay compact and produce fragrant blossoms and sweet fruits.

  • Care Needs: Requires bright sunlight, rich soil, and regular pruning.
  • Tropical Flair: Shiny leaves and aromatic fruit bring the tropics indoors.
  • Styling Tip: Place near a sunny window or under grow lights for best results.

Styling Tropical Trees Indoors

Adding tropical trees isn’t just about placement—it’s about design harmony. Here are styling ideas:

  1. Statement Corners: Use tall tropical trees like fiddle leaf fig or bird of paradise to anchor empty corners.
  2. Clustered Oasis: Group smaller trees like parlor palms with leafy houseplants to create a layered tropical look.
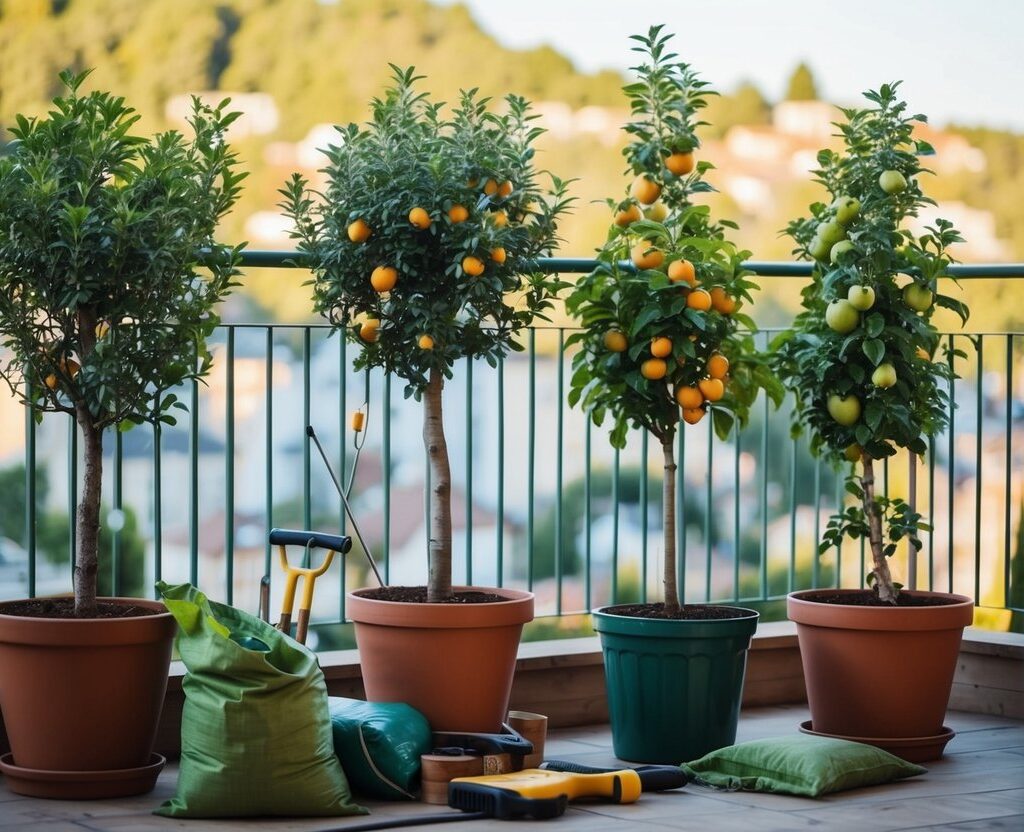
  3. Balcony Jungle: Position banana plants or guava trees near sliding doors for a natural transition between indoors and outdoors.
  4. Decorative Pots: Choose ceramic, rattan, or terracotta pots to enhance the tropical vibe.
  5. Lighting Accents: Spotlights or floor lamps highlighting large foliage add drama to your décor.

Care Tips for Healthy Indoor Tropical Trees

  1. Light: Place trees in areas with bright, indirect light or use grow lights.
  2. Watering: Keep soil moist but not soggy. Use the “finger test” before watering.
  3. Humidity: Mist leaves, use pebble trays, or run humidifiers to mimic tropical environments.
  4. Fertilization: Feed monthly during spring and summer with a balanced liquid fertilizer.
  5. Pruning: Trim dead or yellowing leaves to encourage fresh growth and maintain size.
  6. Repotting: Every 2–3 years, repot into fresh soil to prevent root-bound conditions.
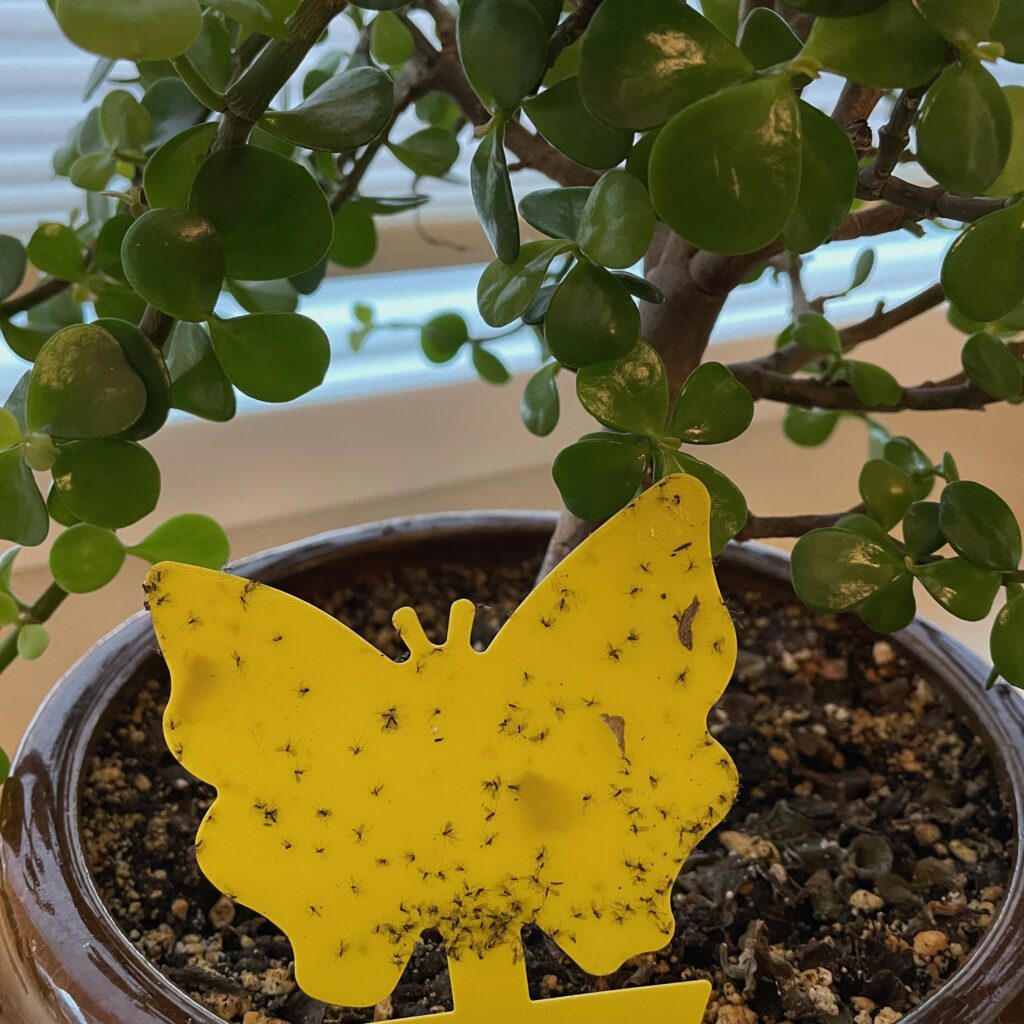
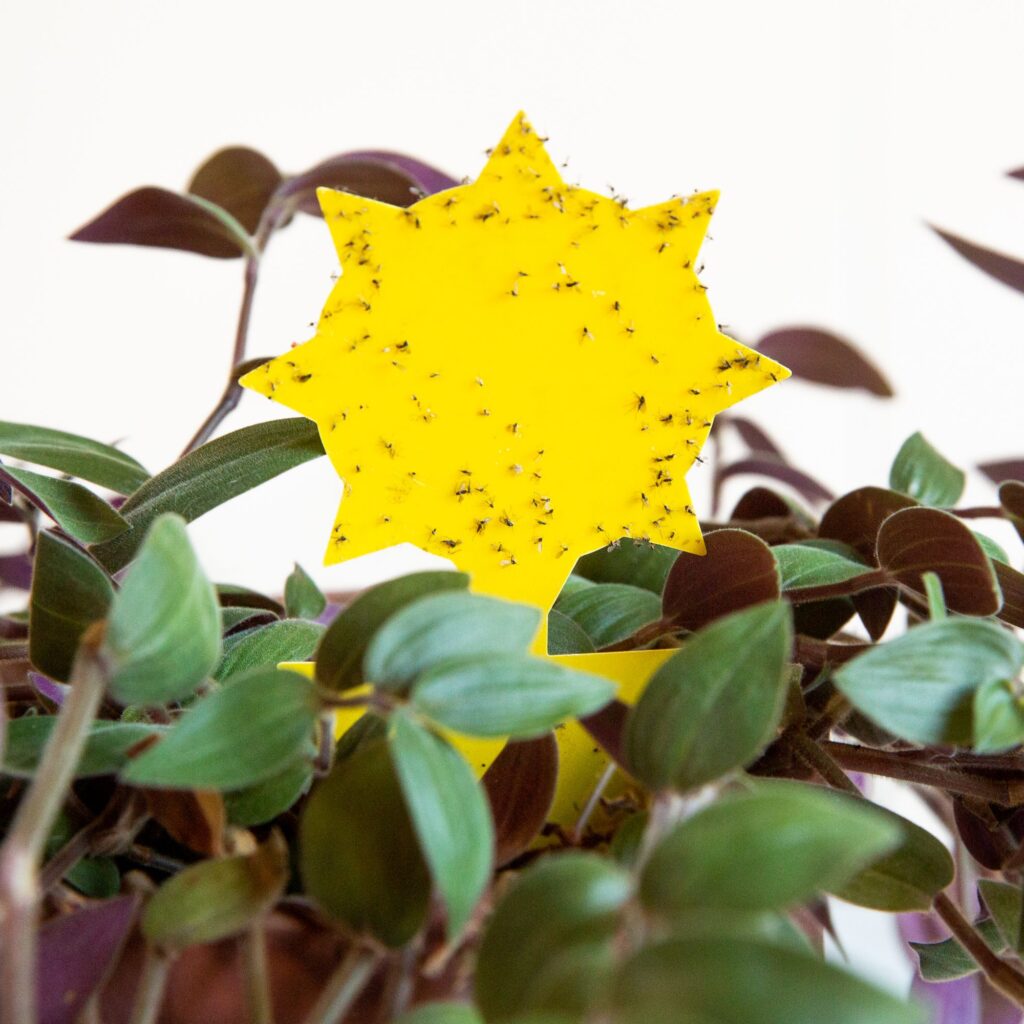
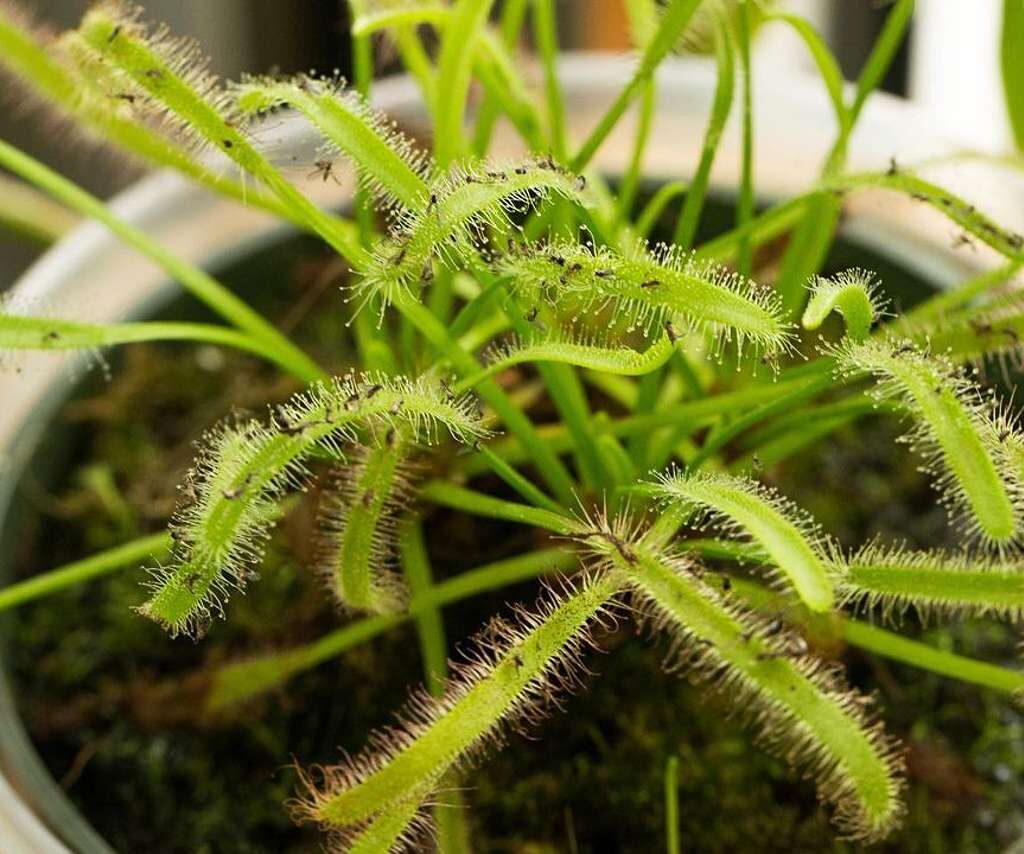
  7. Pest Control: Watch for spider mites, mealybugs, or aphids; treat with neem oil or insecticidal soap.

Benefits of Adding Tropical Trees Indoors

  • Aesthetic Appeal: Bold foliage adds exotic charm to any interior.
  • Mental Wellness: Tropical greenery promotes relaxation, reduces anxiety, and boosts creativity.
  • Improved Air Quality: Many species filter harmful toxins, making your home healthier.
  • Natural Humidifiers: Trees like palms and banana plants release moisture into dry indoor air.
  • Sustainability: Growing edible tropical trees (like guava) provides fresh produce and reduces carbon footprint.

Conclusion

Small tropical trees are the ultimate blend of elegance, nature, and functionality for modern interiors. From the bold fiddle leaf fig to the graceful parlor palm, these plants add warmth, vibrancy, and a refreshing tropical feel to any space. By selecting the right species, providing proper care, and styling them thoughtfully, you can transform your home into a lush tropical haven, no matter where you live.

Whether you crave a dramatic centerpiece like a bird of paradise, a practical edible tree like guava, or a symbolic plant like the money tree, there is a tropical tree for every taste and space. With patience and consistent care, these indoor wonders will reward you with beauty, tranquility, and a touch of paradise all year round.

Balcony-Friendly Fruit Trees That Actually Bear Harvests

Balcony-Friendly Fruit Trees That Actually Bear Harvests

Urban living often comes with limited outdoor space, making balconies and terraces ideal spots for growing fruit trees. While many people assume fruit trees need large gardens to thrive, there are compact, balcony-friendly varieties that can produce delicious harvests year after year. These trees not only provide fresh fruit but also enhance the aesthetics of your balcony, create a sense of greenery, and even improve air quality.

This article explores the best balcony-friendly fruit trees, essential growing tips, and practical strategies to ensure a successful harvest in confined spaces.


Why Grow Fruit Trees on Balconies?

  1. Fresh, Healthy Produce: Harvest ripe fruits directly from your balcony, reducing reliance on store-bought produce.
  2. Space Optimization: Compact fruit trees thrive in containers, making them perfect for small spaces.
  3. Aesthetic Appeal: Fruit trees offer lush foliage, fragrant blossoms, and seasonal color, elevating balcony ambiance.
  4. Stress Relief: Gardening is therapeutic, and caring for fruit trees on a balcony provides relaxation and a sense of accomplishment.
  5. Sustainability: Growing your own fruit reduces packaging waste and supports eco-friendly living.

Even limited spaces can yield nutritious, home-grown fruit when the right trees and techniques are selected.


Factors to Consider Before Planting Fruit Trees on Balconies

1. Container Size

  • Choose large containers (15–25 gallons) to allow sufficient room for root development.
  • Ensure containers have proper drainage holes to prevent waterlogging.

2. Sunlight Exposure

  • Most fruit trees require 6–8 hours of direct sunlight daily for flowering and fruiting.
  • Assess balcony orientation before choosing the tree variety.

3. Tree Size and Growth Habit

  • Select dwarf or semi-dwarf varieties that remain manageable in height and width.
  • Columnar or espalier-trained trees are ideal for vertical growth.

4. Pollination Requirements

  • Some fruit trees require cross-pollination. In balconies, consider self-pollinating varieties or companion planting with another compatible variety.

5. Soil and Fertility

  • Use high-quality potting soil enriched with compost or slow-release fertilizer to support healthy growth and fruiting.

6. Climate Adaptation

  • Choose varieties suited to your local climate to ensure fruit set and disease resistance.

Best Balcony-Friendly Fruit Trees That Actually Bear Harvests

Here are some of the most productive, compact fruit trees for balconies:


1. Dwarf Lemon Trees (Citrus limon ‘Improved Meyer’)

  • Size: 3–6 feet in containers
  • Why It Works: Compact, evergreen, fragrant blossoms, and high fruit yield; suitable for pots.
  • Care Tips: Full sun; regular watering; monthly feeding with citrus fertilizer; protect from frost.
  • Harvest: Multiple crops per year in warm climates.

2. Dwarf Orange Trees (Citrus sinensis ‘Calamondin’)

  • Size: 4–6 feet in pots
  • Why It Works: Produces small, tangy oranges; attractive glossy foliage and fragrant flowers.
  • Care Tips: Full sun; consistent moisture; occasional pruning to maintain shape.
  • Harvest: Year-round fruiting in tropical or subtropical balconies.

3. Dwarf Fig Trees (Ficus carica)

  • Size: 3–5 feet in containers
  • Why It Works: Tolerates partial sun; large, textured leaves; produces sweet, edible figs.
  • Care Tips: Full sun to partial shade; well-draining soil; minimal pruning; protect in frost-prone areas.
  • Harvest: Summer to early autumn depending on variety.

4. Dwarf Peach Trees (Prunus persica ‘Bonanza’ or ‘Garden Belle’)

  • Size: 4–5 feet in pots
  • Why It Works: Compact, manageable size; spring blossoms; juicy peaches in summer.
  • Care Tips: Full sun; regular watering; fertilize monthly; prune for airflow and shape.
  • Harvest: Summer fruits, typically 2–3 peaches per season on small trees.

5. Dwarf Apple Trees (Malus domestica, columnar varieties)

  • Size: 6–8 feet, narrow columnar form
  • Why It Works: Upright growth ideal for narrow spaces; self-pollinating varieties available; produces crisp apples.
  • Care Tips: Full sun; well-draining soil; fertilize in spring and summer; prune lightly for airflow.
  • Harvest: Late summer to autumn, depending on cultivar.

6. Dwarf Pomegranate Trees (Punica granatum ‘Nana’)

  • Size: 3–5 feet in containers
  • Why It Works: Tolerates heat and drought; compact; beautiful flowers followed by bright fruits.
  • Care Tips: Full sun; regular watering; minimal pruning; protect from strong winds.
  • Harvest: Summer to early autumn; fruits are rich in antioxidants.

7. Dwarf Cherry Trees (Prunus avium ‘Stella’ or ‘Compact Stella’)

  • Size: 5–6 feet in containers
  • Why It Works: Compact growth; self-pollinating; spring blossoms with small, sweet cherries.
  • Care Tips: Full sun; consistent watering; fertilize in spring; prune after harvest.
  • Harvest: Late spring to early summer.

8. Dwarf Blueberry Bushes (Vaccinium corymbosum ‘Top Hat’ or ‘Jelly Bean’)

  • Size: 2–3 feet in containers
  • Why It Works: Compact, bushy form; acidic soil-loving; attracts pollinators.
  • Care Tips: Acidic potting soil; full sun; regular watering; mulch to retain moisture.
  • Harvest: Summer months, sweet berries ready for fresh eating.

9. Dwarf Mango Trees (Mangifera indica ‘Pickering’ or ‘Julie’ in warm climates)

  • Size: 4–6 feet in large pots
  • Why It Works: Tropical variety adapted to container growth; produces small but sweet mangoes.
  • Care Tips: Full sun; protect from frost; feed with slow-release fertilizer; prune lightly.
  • Harvest: Summer fruits, depending on flowering cycles.

10. Dwarf Avocado Trees (Persea americana ‘Wurtz’ or ‘Little Cado’)

  • Size: 4–6 feet in pots
  • Why It Works: Compact and container-friendly; creamy avocado fruits; evergreen foliage.
  • Care Tips: Full sun; well-drained soil; protect from strong winds; occasional pruning.
  • Harvest: Depends on climate; fruiting may take a few years.

Tips for Successful Balcony Fruit Gardening

  1. Container Selection: Use sturdy, large pots with drainage holes to accommodate root growth.
  2. Soil Mix: Use nutrient-rich, well-draining soil; add compost for sustained fertility.
  3. Watering: Maintain consistent moisture; avoid waterlogging.
  4. Fertilization: Feed monthly with balanced or species-specific fertilizer.
  5. Pruning: Encourage compact shape, remove dead or crowded branches, and enhance airflow.
  6. Pollination: If necessary, use hand pollination with a soft brush for fruiting indoors or on balconies.
  7. Protection from Pests: Monitor for aphids, mites, or fungal issues; organic sprays or natural predators help control infestations.
  8. Sunlight Maximization: Rotate containers to ensure even light exposure.

Design Ideas for Balcony Fruit Trees

  1. Vertical Arrangement: Use trellises or railing planters to support dwarf trees.
  2. Container Grouping: Combine multiple fruit trees in different pots to create a mini orchard.
  3. Multi-Season Appeal: Mix flowering and fruiting trees to provide blooms and harvests throughout the year.
  4. Edible Landscaping: Pair fruit trees with herbs and small vegetables for a productive balcony garden.
  5. Decorative Pots: Use stylish containers to complement the balcony decor while supporting healthy root growth.

Benefits of Growing Fruit Trees on Balconies

  • Fresh, Nutritious Harvests: Home-grown fruit is fresher and pesticide-free.
  • Aesthetic and Fragrance: Blossoms and foliage enhance balcony ambiance.
  • Stress Reduction: Gardening provides relaxation and mental well-being.
  • Sustainable Living: Reduces dependency on store-bought fruit and packaging waste.
  • Educational Opportunity: Great for children to learn about plant growth and fruit development.

Conclusion

Growing balcony-friendly fruit trees proves that limited space does not restrict access to fresh, home-grown produce. Dwarf lemons, oranges, figs, peaches, apples, and other compact varieties are ideal for containers, providing delicious harvests while enhancing the beauty of urban balconies.

By selecting appropriate species, providing adequate sunlight, water, and nutrients, and practicing regular pruning, even small balcony gardens can yield productive, vibrant, and attractive fruit trees. With the right care, balcony gardening can transform a simple outdoor space into a mini orchard, offering both aesthetic pleasure and nutritious rewards year after year.

Shade-Tolerant Trees That Work in Compact Gardens

Shade-Tolerant Trees That Work in Compact Gardens

Gardening in small spaces often presents unique challenges, especially when sunlight is limited. Compact gardens, narrow courtyards, or patio spaces may receive only partial sun or shade due to buildings, walls, or larger trees. In such conditions, choosing shade-tolerant trees is crucial to create a lush, vibrant landscape without compromising growth or aesthetics.

Shade-tolerant trees are specially adapted to thrive in lower light conditions, offering foliage, structure, and seasonal interest even where sun exposure is minimal. This article explores the best shade-tolerant trees for compact gardens, their benefits, and practical tips for planting and care.


Why Shade-Tolerant Trees Are Important for Small Gardens

  1. Maximizing Limited Light: Shade-tolerant trees thrive where sunlight is restricted, ensuring your garden remains lively and green.
  2. Creating Vertical Interest: Even in small spaces, trees provide height, texture, and a sense of enclosure.
  3. Enhancing Privacy: Shade trees can act as natural screens between properties or against streets.
  4. Low Maintenance Options: Many shade-tolerant trees are slow-growing, hardy, and resistant to pests.
  5. Complementing Garden Designs: Their foliage, flowers, or bark add multi-seasonal appeal, even in low-light areas.

By incorporating shade-tolerant trees, compact gardens can achieve visual balance, ecological benefits, and a serene atmosphere.


Factors to Consider When Selecting Shade-Tolerant Trees

Selecting the right tree for a shaded, compact garden requires attention to the following factors:

1. Mature Size

  • Choose dwarf or small varieties to avoid overcrowding. Compact trees typically range from 6–20 feet in height.

2. Light Requirements

  • Evaluate whether the location is full shade, partial shade, or dappled sunlight. Most shade-tolerant trees perform well in 2–4 hours of indirect sunlight.

3. Root Behavior

  • Opt for trees with non-invasive roots to prevent damage to small garden beds, pathways, or patios.

4. Growth Rate

  • Slow-growing species are ideal for maintaining size and reducing maintenance.

5. Seasonal Interest

  • Consider foliage color, flowers, fruit, or bark texture to enhance visual appeal throughout the year.

Best Shade-Tolerant Trees for Compact Gardens

Here are some of the most reliable and attractive trees that thrive in shade while staying suitable for small spaces:


1. Japanese Maple (Acer palmatum dwarf varieties)

  • Height/Spread: 6–15 feet
  • Why It Works: Thrives in partial shade; delicate foliage adds texture and seasonal color; non-invasive roots.
  • Care Tips: Moist, well-draining soil; avoid full afternoon sun; prune lightly to maintain compact form.
  • Best Use: Corner accent or container planting in shaded patios.

2. Dogwood (Cornus florida dwarf forms)

  • Height/Spread: 10–15 feet
  • Why It Works: Tolerates partial shade; spring flowers and fall foliage add seasonal beauty.
  • Care Tips: Moist, well-drained soil; avoid heavy shade; prune after flowering.
  • Best Use: Near shaded walkways or entrance pathways.

3. Hollies (Ilex spp. dwarf varieties)

  • Height/Spread: 6–12 feet
  • Why It Works: Evergreen foliage provides year-round greenery; berries attract wildlife; shade-tolerant.
  • Care Tips: Partial shade; well-drained soil; occasional pruning for shape.
  • Best Use: Hedge-like screening or focal points in shaded garden corners.

4. Camellia (Camellia japonica dwarf forms)

  • Height/Spread: 6–10 feet
  • Why It Works: Beautiful glossy leaves with winter or spring blooms; thrives in dappled shade.
  • Care Tips: Acidic, well-draining soil; consistent moisture; protect from direct afternoon sun.
  • Best Use: Patios, under tree canopies, or shaded borders.

5. Eastern Redbud (Cercis canadensis dwarf forms)

  • Height/Spread: 10–15 feet
  • Why It Works: Early spring blossoms, adaptable to shade; small, elegant form for compact gardens.
  • Care Tips: Partial shade; moderate watering; prune occasionally for shape.
  • Best Use: Accent tree for shaded areas near patios or garden seating.

6. Fatsia japonica (Japanese Aralia)

  • Height/Spread: 6–10 feet
  • Why It Works: Large, glossy leaves add tropical flair; grows well in full shade to partial shade.
  • Care Tips: Well-drained soil; moderate watering; container-friendly.
  • Best Use: Patio corners, terraces, or shaded balcony gardens.

7. Dwarf Magnolia (Magnolia grandiflora ‘Little Gem’)

  • Height/Spread: 10–15 feet
  • Why It Works: Compact form with glossy evergreen leaves; fragrant blooms add charm in shaded spaces.
  • Care Tips: Partial shade; regular watering; prune lightly to maintain size.
  • Best Use: Entrance pathways or shaded garden beds.

8. Hornbeam (Carpinus betulus dwarf forms)

  • Height/Spread: 8–12 feet
  • Why It Works: Tolerates shade; dense foliage for screening or structural interest; slow-growing.
  • Care Tips: Moist, well-drained soil; prune to maintain compact form.
  • Best Use: Hedges or small garden corners in shaded spots.

9. Aucuba japonica (Gold Dust Plant)

  • Height/Spread: 6–8 feet
  • Why It Works: Tolerates deep shade; evergreen leaves with yellow speckles; low maintenance.
  • Care Tips: Moist soil; avoid strong afternoon sun; minimal pruning required.
  • Best Use: Shaded borders or under canopy plantings.

10. Japanese Stewartia (Stewartia pseudocamellia dwarf forms)

  • Height/Spread: 10–15 feet
  • Why It Works: Showy flowers, exfoliating bark, and adaptability to partial shade; suitable for small spaces.
  • Care Tips: Moist, well-drained soil; protect from strong winds; prune lightly.
  • Best Use: Shaded focal point in compact gardens or patios.

Planting and Care Tips

  1. Soil Preparation: Mix compost into garden beds for nutrient-rich, well-draining soil.
  2. Proper Spacing: Ensure at least 3–5 feet between trees to allow healthy growth in compact spaces.
  3. Watering: Young trees need consistent moisture; mature trees are often more drought-tolerant.
  4. Mulching: Apply 2–3 inches of mulch around the base to conserve moisture and suppress weeds.
  5. Pruning: Remove dead or damaged branches; maintain compact form suitable for small gardens.
  6. Fertilization: Apply slow-release fertilizers in spring to encourage healthy growth and vibrant foliage.

Design Ideas for Compact Shaded Gardens

  1. Layered Planting: Combine small shade trees with ferns, hostas, or shade-loving perennials for depth and texture.
  2. Patio Corners: Japanese maple or dwarf magnolia in containers brighten shaded corners.
  3. Vertical Accents: Hornbeam or hollies provide height without taking up too much horizontal space.
  4. Shaded Entrances: Camellias or redbuds near doorways create a welcoming, lush look.
  5. Mixed Foliage: Pair dark green shade-tolerant trees with variegated plants like aucuba for contrast.

Benefits of Shade-Tolerant Trees in Compact Gardens

  • Optimized Small Spaces: Trees thrive where sunlight is limited, making every corner productive.
  • Year-Round Interest: Evergreen varieties provide structure while flowering species add seasonal charm.
  • Low-Maintenance Options: Slow-growing and hardy species reduce care requirements.
  • Functional Landscaping: Trees offer privacy, shade, and natural cooling.
  • Ecological Value: Support birds, insects, and overall garden biodiversity.

Conclusion

Shade-tolerant trees are essential for compact gardens with limited sunlight, transforming small spaces into lush, serene environments. From Japanese maples and dogwoods to dwarf hollies and camellias, these trees provide structure, foliage, and seasonal beauty while thriving in low-light conditions.

By selecting the right species, preparing soil carefully, and providing consistent care, even shaded small gardens can achieve vibrant greenery, vertical interest, and ecological balance. Shade-tolerant trees prove that compact spaces need not sacrifice beauty or functionality—they can be oases of tranquility and charm, regardless of sunlight limitations.

Trees That Bring Autumn Colors to Small Spaces

Trees That Bring Autumn Colors to Small Spaces

Autumn is a season of transformation, with vibrant reds, fiery oranges, and golden yellows painting landscapes. Even in small yards, patios, or balconies, autumn-colored trees can create a breathtaking seasonal display. Compact or dwarf varieties are perfect for limited spaces, providing spectacular fall foliage without overwhelming the area.

This article explores the best trees for autumn color in small spaces, their benefits, and practical tips for planting and maintenance.


Why Autumn-Colored Trees Are Ideal for Small Spaces

  1. Seasonal Beauty: Fall-colored trees provide visual interest even in compact gardens.
  2. Vertical Accent: Small trees can add height and structure without taking up much ground space.
  3. Versatile Placement: Perfect for patios, balconies, narrow yards, or as focal points near entrances.
  4. Low Maintenance: Many dwarf varieties are slow-growing, pest-resistant, and require minimal pruning.
  5. Year-Round Appeal: Evergreen companions or seasonal perennials can complement autumn hues for continuous interest.

By selecting the right trees, even small landscapes can display dramatic autumn scenery.


Factors to Consider When Choosing Autumn Trees for Small Spaces

Before choosing a tree, evaluate these key considerations:

1. Mature Size

  • Small or dwarf trees typically range from 6–20 feet, perfect for limited spaces.

2. Growth Rate

  • Slow-growing or moderate trees are ideal for easy maintenance.

3. Sunlight Requirements

  • Most autumn trees thrive in full sun to partial shade.

4. Soil Conditions

  • Well-draining soil ensures healthy root development and vibrant foliage.

5. Foliage Longevity

  • Some trees hold their autumn color longer, providing extended seasonal impact.

Best Trees That Bring Autumn Colors to Small Spaces

Here are ten trees renowned for their compact size and stunning fall foliage:


1. Japanese Maple (Acer palmatum dwarf varieties)

  • Height/Spread: 6–15 feet
  • Autumn Colors: Deep red, crimson, orange, or yellow
  • Why It Works: Slow-growing, compact, and non-invasive roots; vibrant fall colors make it a focal point.
  • Care Tips: Partial shade; well-drained soil; minimal pruning; ideal for patio pots or garden corners.

2. Dogwood (Cornus florida dwarf forms)

  • Height/Spread: 10–15 feet
  • Autumn Colors: Red and orange leaves
  • Why It Works: Spring flowers plus fall foliage; compact for small yards.
  • Care Tips: Partial shade; moist, well-drained soil; prune lightly to maintain shape.

3. Redbud (Cercis canadensis)

  • Height/Spread: 12–20 feet
  • Autumn Colors: Yellow leaves in fall
  • Why It Works: Small, elegant tree with early spring flowers and fall color; adaptable to small spaces.
  • Care Tips: Full sun to partial shade; moderate watering; prune occasionally for form.

4. Crape Myrtle (Lagerstroemia indica dwarf varieties)

  • Height/Spread: 8–15 feet
  • Autumn Colors: Yellow, red, or bronze foliage
  • Why It Works: Long-lasting flowers in summer; attractive bark adds winter interest.
  • Care Tips: Full sun; well-drained soil; prune lightly in winter to maintain shape.

5. Sourwood (Oxydendrum arboreum dwarf forms)

  • Height/Spread: 10–15 feet
  • Autumn Colors: Fiery red and orange
  • Why It Works: Compact form with long-lasting fall color; small flowers in summer attract pollinators.
  • Care Tips: Full sun to partial shade; moist, acidic, well-draining soil; minimal pruning.

6. Serviceberry (Amelanchier spp. dwarf cultivars)

  • Height/Spread: 8–12 feet
  • Autumn Colors: Red, orange, and yellow leaves
  • Why It Works: Multi-season appeal with spring flowers, summer berries, and fall color.
  • Care Tips: Full sun to partial shade; well-drained soil; prune lightly after flowering.

7. Japanese Stewartia (Stewartia pseudocamellia dwarf forms)

  • Height/Spread: 10–15 feet
  • Autumn Colors: Orange and red leaves
  • Why It Works: Showy flowers, exfoliating bark, and brilliant fall color; compact enough for small gardens.
  • Care Tips: Partial shade; moist, well-drained soil; occasional pruning.

8. Autumn Blaze Maple (Acer × freemanii dwarf varieties)

  • Height/Spread: 10–20 feet
  • Autumn Colors: Bright red, orange, and yellow
  • Why It Works: Rapid color change; dwarf cultivars suitable for small yards.
  • Care Tips: Full sun; moderate watering; prune as needed to maintain size.

9. Sweetgum (Liquidambar styraciflua dwarf forms)

  • Height/Spread: 10–15 feet
  • Autumn Colors: Yellow, orange, red, and purple
  • Why It Works: Star-shaped leaves with stunning fall display; dwarf forms for small landscapes.
  • Care Tips: Full sun; moist, well-draining soil; prune lightly to shape.

10. Korean Maple (Acer pseudosieboldianum dwarf forms)

  • Height/Spread: 8–12 feet
  • Autumn Colors: Red and orange hues
  • Why It Works: Cold-hardy, compact, and vibrant fall color for small yards or containers.
  • Care Tips: Partial shade; well-drained soil; minimal pruning; slow-growing.

Planting and Maintenance Tips

  1. Proper Placement: Maintain at least 3–5 feet from walls, fences, or pathways to prevent overcrowding.
  2. Soil Preparation: Amend soil with compost for nutrient-rich, well-drained planting beds.
  3. Watering: Young trees need regular watering; mature trees require less frequent irrigation.
  4. Pruning: Remove dead or crossing branches; maintain compact form for small spaces.
  5. Fertilization: Apply slow-release fertilizer in spring to enhance foliage and color intensity.
  6. Pest Control: Dwarf varieties are often resistant; monitor for pests and treat naturally when needed.

Design Ideas for Small Gardens

  1. Corner Accents: Plant Japanese maple or crape myrtle in corners to create vertical interest.
  2. Container Trees: Use dwarf autumn trees in large pots for patios, terraces, or balconies.
  3. Entrance Highlights: Place trees with vibrant fall color near entrances to enhance seasonal appeal.
  4. Layered Planting: Combine evergreen shrubs with dwarf autumn trees for year-round interest.
  5. Seasonal Harmony: Pair flowering spring trees with autumn-colored trees for multi-season beauty.

Benefits of Autumn-Colored Trees in Small Spaces

  • Visual Impact: Compact trees deliver dramatic color without overwhelming small areas.
  • Seasonal Charm: Fall foliage adds warmth and vibrancy to gardens, patios, or balconies.
  • Low Maintenance: Many dwarf trees require minimal pruning and are slow-growing.
  • Functional Landscaping: Can provide shade, frame pathways, and define garden areas.
  • Environmental Value: Trees improve air quality and provide habitats for pollinators and birds.

Conclusion

Autumn-colored trees bring seasonal magic to small spaces, transforming patios, balconies, and compact yards into vibrant landscapes. Dwarf varieties such as Japanese maples, dogwoods, and crape myrtles provide spectacular fall color, multi-season interest, and compact growth, making them ideal for limited spaces.

By choosing the right species, planting in appropriate locations, and providing basic care, homeowners can enjoy the beauty of autumn year after year. Even the smallest garden can become a canvas of red, orange, and gold, proving that size is no limitation when it comes to creating memorable, colorful landscapes.

Small Trees Ideal for Driveways and Entrances

Small Trees Ideal for Driveways and Entrances

The first impression of any property often comes from its entrance or driveway. A well-chosen small tree can instantly enhance curb appeal, create a welcoming atmosphere, and define the architectural character of your home. Unlike large trees that may overpower narrow spaces, small trees are perfect for framing driveways, accenting entrances, and adding vertical interest without obstructing views or utility access.

This article explores the best small trees for driveways and entrances, factors to consider when choosing them, planting strategies, and care tips to maintain a beautiful, functional landscape.


Why Small Trees Work for Driveways and Entrances

Small trees offer several advantages when placed along driveways or near entrances:

  1. Space Efficiency: They fit narrow driveways or small yards without crowding or overhanging structures.
  2. Safety and Visibility: Their compact size ensures they do not obstruct drivers’ views or pedestrian pathways.
  3. Aesthetic Framing: Trees can naturally frame walkways, gates, or garage entrances, creating symmetry and elegance.
  4. Low Maintenance: Many small trees are slow-growing, drought-tolerant, and pest-resistant, requiring minimal care.
  5. Seasonal Interest: Flowering or colorful foliage varieties enhance visual appeal year-round.

Factors to Consider When Choosing Trees for Driveways and Entrances

Before selecting small trees, evaluate these key considerations:

1. Mature Size

  • Choose trees that stay compact, generally under 20 feet in height, to avoid interference with driveways, garage doors, or power lines.

2. Root System

  • Opt for trees with non-invasive root systems to prevent driveway cracks or foundation damage.

3. Growth Rate

  • Slow-growing or moderate trees minimize frequent pruning.

4. Sunlight Exposure

  • Determine if the area receives full sun, partial shade, or full shade, and select species accordingly.

5. Maintenance Requirements

  • Low-maintenance species reduce the need for regular pruning, fertilization, or pest management.

6. Visual Appeal

  • Consider flowering trees, colorful foliage, or unique bark patterns to add seasonal charm.

Best Small Trees for Driveways and Entrances

Here are some of the most attractive, functional, and compact trees suited for lining driveways or enhancing entrances:


1. Japanese Maple (Acer palmatum dwarf varieties)

  • Height/Spread: 8–15 feet
  • Why It Works: Elegant foliage with vibrant red, orange, or green leaves; slow-growing and non-invasive roots.
  • Care Tips: Partial shade; well-drained soil; minimal pruning; drought-tolerant once established.
  • Best Use: Flanking entrance pathways or at the driveway’s corners for a graceful frame.

2. Crape Myrtle (Lagerstroemia indica dwarf varieties)

  • Height/Spread: 8–20 feet
  • Why It Works: Long-lasting summer flowers, attractive bark, and low maintenance.
  • Care Tips: Full sun; well-drained soil; prune in late winter to maintain shape.
  • Best Use: Line driveway edges or plant near entryways for seasonal floral interest.

3. Dogwood (Cornus florida dwarf varieties)

  • Height/Spread: 10–15 feet
  • Why It Works: Spring blossoms and fall foliage; non-invasive roots; compact shape.
  • Care Tips: Partial shade; moist, well-drained soil; minimal pruning.
  • Best Use: Near entrances to add seasonal color and elegance.

4. Dwarf Magnolia (Magnolia grandiflora ‘Little Gem’)

  • Height/Spread: 10–15 feet
  • Why It Works: Evergreen foliage with fragrant, showy blooms; compact for small spaces.
  • Care Tips: Full sun to partial shade; regular watering; occasional pruning to maintain shape.
  • Best Use: Near porch entrances or driveway corners for a fragrant welcome.

5. Eastern Redbud (Cercis canadensis)

  • Height/Spread: 12–20 feet
  • Why It Works: Early spring pink or purple blossoms; adaptable to urban soil; small and elegant form.
  • Care Tips: Full sun to partial shade; moderate watering; prune occasionally for shape.
  • Best Use: Accent tree near gates or driveway entrances for seasonal charm.

6. Olive Tree (Olea europaea dwarf cultivars)

  • Height/Spread: 6–10 feet
  • Why It Works: Silvery-green foliage; slow-growing and drought-tolerant; Mediterranean appeal.
  • Care Tips: Full sun; well-draining soil; minimal watering once established; protect from frost.
  • Best Use: Potted along driveway or flanking entrance pathways for a Mediterranean feel.

7. Crabapple (Malus spp. dwarf forms)

  • Height/Spread: 8–12 feet
  • Why It Works: Spring blooms with edible fruit; compact, non-invasive roots.
  • Care Tips: Full sun; moderate watering; prune after flowering.
  • Best Use: Near driveways to provide seasonal color and subtle fragrance.

8. Holly (Ilex crenata dwarf varieties)

  • Height/Spread: 6–10 feet
  • Why It Works: Dense evergreen foliage; small, non-invasive roots; winter berries add festive appeal.
  • Care Tips: Full sun to partial shade; well-drained soil; prune lightly to maintain form.
  • Best Use: Hedge-like arrangement along driveways or near entrances for structure and greenery year-round.

9. Japanese Stewartia (Stewartia pseudocamellia dwarf forms)

  • Height/Spread: 10–15 feet
  • Why It Works: White camellia-like flowers, beautiful exfoliating bark, moderate growth; non-invasive roots.
  • Care Tips: Partial shade; moist, well-draining soil; occasional pruning.
  • Best Use: Decorative focal points near gates or driveway edges.

10. Saucer Magnolia (Magnolia × soulangeana dwarf cultivars)

  • Height/Spread: 8–12 feet
  • Why It Works: Large, fragrant spring flowers; manageable size; minimal maintenance.
  • Care Tips: Full sun to partial shade; moderate watering; prune lightly to maintain shape.
  • Best Use: Entrance accent tree or driveway corner planting for seasonal floral display.

Planting and Maintenance Tips

  1. Correct Placement: Maintain at least 5–10 feet of clearance from driveways and pathways to avoid obstruction.
  2. Mulching: Apply 2–3 inches of mulch around the base to conserve moisture and prevent weed growth.
  3. Watering: Newly planted trees need consistent watering; mature trees require less frequent irrigation.
  4. Pruning: Light pruning removes dead or crossing branches and maintains a compact form suitable for driveways.
  5. Soil Care: Ensure well-draining soil; amend with compost if necessary to support healthy growth.
  6. Pest Management: Select resistant varieties and inspect regularly for common pests.

Design Ideas for Driveways and Entrances

  1. Symmetrical Planting: Use matching trees on either side of a driveway or entrance gate for a formal, welcoming look.
  2. Accent Corners: Place flowering trees like dogwoods or magnolias at driveway corners to draw attention to architectural features.
  3. Mixed Seasonal Appeal: Combine evergreen and flowering small trees for year-round structure and periodic bursts of color.
  4. Container Trees: Dwarf olives or magnolias in large pots create flexible, portable accents near entrances.
  5. Layered Landscaping: Mix small trees with shrubs, perennials, and groundcovers for depth, texture, and continuous interest.

Benefits of Using Small Trees for Driveways and Entrances

  • Enhanced Curb Appeal: Attractive, well-placed trees create a strong first impression.
  • Functional Beauty: Trees can shade vehicles, soften architectural lines, and define boundaries.
  • Low-Maintenance Options: Many small trees thrive with minimal care while providing seasonal interest.
  • Sustainable Landscaping: Drought-tolerant and pest-resistant trees reduce water usage and chemical inputs.
  • Property Value Increase: Aesthetic landscaping with small trees can increase home value and desirability.

Conclusion

Small trees are ideal for driveways and entrances, combining beauty, practicality, and low-maintenance care. From Japanese maples and crape myrtles to dwarf magnolias and olive trees, these compact varieties provide color, fragrance, and architectural interest without overwhelming limited spaces.

By selecting species suited to your climate and driveway dimensions, planting carefully, and following simple maintenance practices, homeowners can create inviting, elegant entrances that enhance curb appeal and provide year-round visual charm. Small trees prove that thoughtful landscaping can transform ordinary driveways and entrances into welcoming, aesthetically pleasing spaces that impress visitors and improve the quality of outdoor living.

Flowering Indoor Trees That Add Fragrance and Charm

Flowering Indoor Trees That Add Fragrance and Charm

Indoor gardening has evolved from a functional practice to a lifestyle choice. Homeowners increasingly seek plants that provide not just greenery, but fragrance, color, and visual elegance. Flowering indoor trees are ideal for this purpose—they bring a touch of nature inside, filling spaces with fragrance while serving as striking decorative elements. Compact and adaptable, these trees suit apartments, small living rooms, sunrooms, and office spaces.

This article explores the best flowering indoor trees, their benefits, and practical care tips to help gardeners create fragrant, charming interiors.


Why Choose Flowering Indoor Trees?

Indoor trees offer more than ornamental value. Flowering indoor trees specifically provide:

  1. Year-Round Fragrance: Many flowering indoor trees bloom periodically, releasing pleasant aromas that uplift mood and atmosphere.
  2. Decorative Appeal: Elegant branches, glossy leaves, and colorful blossoms create natural focal points in interiors.
  3. Air Purification: Many indoor trees filter toxins, improving indoor air quality.
  4. Psychological Benefits: Exposure to flowering plants can reduce stress, enhance creativity, and boost well-being.
  5. Versatility: Small and medium-sized indoor trees can fit in corners, balconies, or large containers, adding vertical greenery without cluttering space.

Flowering indoor trees combine aesthetic charm with functional benefits, making them an excellent investment for indoor living.


Factors to Consider When Selecting Flowering Indoor Trees

To ensure indoor trees thrive and bloom, consider the following:

1. Light Requirements

  • Many flowering trees need bright, indirect light. Some tolerate low light but may bloom less frequently.
  • Place near windows with morning sunlight or use grow lights if natural light is limited.

2. Size and Growth Habit

  • Choose compact or slow-growing varieties to prevent overcrowding indoors.
  • Consider pruning to maintain shape and size.

3. Humidity and Temperature

  • Tropical flowering trees often require moderate humidity and stable temperatures.
  • Avoid placing trees near drafts, heaters, or air conditioners.

4. Watering and Soil Needs

  • Well-draining soil is essential to prevent root rot.
  • Watering frequency depends on species and container size; avoid overwatering.

5. Fragrance and Blooming Period

  • Consider trees with aromatic flowers and predictable bloom cycles to maximize indoor enjoyment.

Best Flowering Indoor Trees

Here are some of the most charming and fragrant flowering trees suitable for indoor environments:


1. Kaffir Lily Tree (Clivia miniata)

  • Height/Spread: 1.5–3 feet, compact and manageable
  • Flower Colors: Vibrant orange-red blooms
  • Fragrance: Mildly sweet, subtle scent
  • Why It Works: Compact and shade-tolerant, perfect for corners or tabletops. Flowers appear in winter or early spring, brightening interiors.
  • Care Tips: Moderate watering; indirect sunlight; slow-growing, minimal maintenance.

2. Gardenia (Gardenia jasminoides)

  • Height/Spread: 2–6 feet, suitable for containers
  • Flower Colors: Pure white blossoms
  • Fragrance: Strong, sweet, and intoxicating
  • Why It Works: Classic indoor flowering tree; glossy evergreen leaves complement fragrant blooms.
  • Care Tips: Bright, indirect light; humid conditions; well-draining acidic soil; consistent moisture.

3. Dwarf Citrus Trees (Meyer Lemon, Calamondin Orange, Kumquat)

  • Height/Spread: 3–6 feet in pots
  • Flower Colors: White flowers
  • Fragrance: Citrus-scented blossoms, refreshing and uplifting
  • Why It Works: Combines edible fruit with fragrant flowers; bright, glossy leaves enhance decor.
  • Care Tips: Full sunlight (6–8 hours); moderate watering; rotate for even light exposure; occasional pruning to shape.

4. Jasmine Tree (Jasminum polyanthum)

  • Height/Spread: 3–5 feet indoors, can be trellised
  • Flower Colors: White or pale pink clusters
  • Fragrance: Strong, sweet, highly aromatic
  • Why It Works: Rapid growth and climber potential; ideal for decorative trellises or hanging containers indoors.
  • Care Tips: Bright light; regular watering; support for climbing; prune after flowering for shape.

5. Dwarf Hibiscus (Hibiscus rosa-sinensis compact forms)

  • Height/Spread: 3–6 feet indoors
  • Flower Colors: Red, pink, yellow, or white
  • Fragrance: Mildly sweet scent
  • Why It Works: Large, tropical flowers create a bold, exotic appearance in interiors.
  • Care Tips: Bright sunlight; well-draining soil; avoid overwatering; feed monthly during growing season.

6. Camellia (Camellia japonica dwarf varieties)

  • Height/Spread: 2–5 feet
  • Flower Colors: White, pink, red
  • Fragrance: Light, delicate scent
  • Why It Works: Evergreen leaves with seasonal blooms; elegant for tabletops or corner displays.
  • Care Tips: Bright, indirect light; acidic, well-drained soil; moderate watering; mist to maintain humidity.

7. Frangipani (Plumeria spp.)

  • Height/Spread: 3–6 feet indoors
  • Flower Colors: White, yellow, pink, red
  • Fragrance: Sweet, tropical, heady scent
  • Why It Works: Striking blooms bring tropical charm; ideal for sunny indoor spots.
  • Care Tips: Full sunlight; allow soil to dry slightly between waterings; minimal pruning required.

8. Dwarf Oleander (Nerium oleander compact forms)

  • Height/Spread: 3–5 feet
  • Flower Colors: Pink, red, white
  • Fragrance: Mildly fragrant
  • Why It Works: Hardy, evergreen foliage with vibrant flowers; tolerates indoor conditions well.
  • Care Tips: Bright light; well-draining soil; occasional pruning; caution as plant is toxic if ingested.

9. Mogra or Arabian Jasmine (Jasminum sambac dwarf forms)

  • Height/Spread: 3–4 feet indoors
  • Flower Colors: White clusters
  • Fragrance: Strong, sweet, and highly aromatic
  • Why It Works: Compact climber; blooms attract attention and fill rooms with fragrance.
  • Care Tips: Bright light; regular watering; support for climbing; prune after flowering to maintain compact shape.

10. Dwarf Magnolia (Magnolia grandiflora ‘Little Gem’)

  • Height/Spread: 3–6 feet indoors
  • Flower Colors: Large, creamy white blooms
  • Fragrance: Sweet, citrusy scent
  • Why It Works: Glossy evergreen leaves with showy flowers; compact size makes it ideal for indoor container growth.
  • Care Tips: Bright sunlight; consistent moisture; prune lightly to shape; suitable for large pots.

Care Tips for Flowering Indoor Trees

  1. Pot Selection: Use containers with drainage holes to prevent waterlogging.
  2. Light Management: Place trees near bright windows or use supplemental grow lights for flowering species.
  3. Watering Routine: Water when top inch of soil feels dry; avoid stagnant water.
  4. Humidity and Temperature: Most flowering indoor trees prefer moderate humidity (40–60%) and temperatures between 65–75°F (18–24°C).
  5. Fertilization: Use slow-release or liquid fertilizers during the growing season to support blooms.
  6. Pruning: Remove dead flowers and branches; prune to maintain compact, manageable shape.
  7. Pest Control: Inspect regularly for pests like aphids or spider mites; treat with natural or mild insecticidal soap if needed.

Design Ideas Using Flowering Indoor Trees

  1. Corner Focal Points: Place a dwarf magnolia or camellia in an empty corner to draw attention.
  2. Patio or Balcony Trees: Dwarf citrus trees add fragrance, color, and occasional fruit to small outdoor spaces.
  3. Tabletop Elegance: Small clivia or jasmine trees can enhance coffee tables or console tables.
  4. Room Dividers: Taller indoor trees like hibiscus or plumeria can subtly divide open spaces while adding floral interest.
  5. Layered Indoor Gardens: Combine flowering trees with ferns, palms, or succulents to create a dynamic, textured indoor garden.

Benefits of Flowering Indoor Trees

  • Aesthetic Charm: Adds elegance, color, and texture to interiors.
  • Fragrance: Enhances indoor ambiance naturally.
  • Air Purification: Reduces indoor pollutants and improves air quality.
  • Mental Health Benefits: Exposure to greenery and fragrance reduces stress and improves focus.
  • Versatility: Suitable for apartments, offices, sunrooms, or small living spaces.

Conclusion

Flowering indoor trees provide a unique combination of fragrance, charm, and decorative appeal for modern interiors. From clivias and gardenias to dwarf citrus and magnolias, these trees deliver seasonal blooms, pleasant aromas, and year-round greenery in manageable sizes.

By selecting the right species, providing appropriate light, water, and humidity, and incorporating them into creative indoor designs, homeowners can transform their living spaces into fragrant, vibrant, and visually stunning environments. Flowering indoor trees prove that even compact spaces can offer sensory delight and natural beauty, enhancing both aesthetics and well-being.

Growing Raspberries at Home for Sweet Treats

Growing Raspberries at Home for Sweet Treats

Raspberries (Rubus idaeus) are among the most delicious and versatile fruits for home gardeners. Their sweet, tangy flavor makes them ideal for fresh eating, baking, jams, and smoothies. Beyond their taste, raspberries are packed with vitamins, antioxidants, and fiber, contributing to a healthy diet. Growing raspberries at home ensures a steady supply of fresh, chemical-free fruit, while also adding beauty and structure to gardens.

This article provides a comprehensive guide for beginners on growing raspberries at home, covering site selection, soil preparation, planting, pruning, fertilization, pest control, and harvesting. By following these steps, gardeners can enjoy bountiful raspberry harvests year after year.


Why Grow Raspberries at Home?

Homegrown raspberries offer numerous benefits:

  1. Freshness: Pick fruit at peak ripeness for maximum flavor.
  2. Health Benefits: Raspberries are rich in vitamin C, fiber, and antioxidants.
  3. Cost-Effective: Avoid the high price of store-bought berries.
  4. Control Over Quality: Grow organic, pesticide-free fruit.
  5. Garden Aesthetics: Raspberry canes and blossoms enhance garden beauty.

Tip: Raspberries are perennial plants, meaning they can produce fruit for several years with proper care.


Step 1: Choosing the Right Raspberry Variety

Select varieties suited to your climate and intended harvest time:

  • Summer-Bearing Raspberries: Produce fruit once per year, usually in mid to late summer.
  • Ever-Bearing (Fall-Bearing) Raspberries: Produce two crops, one in summer and one in fall, extending the harvest season.
  • Red, Black, and Yellow Varieties: Red raspberries are most common, while black and yellow varieties provide unique flavors and colors.

Tip: Choose disease-resistant cultivars for easier management and higher yields.


Step 2: Selecting the Best Site

Raspberries require specific conditions for healthy growth:

  1. Sunlight: Full sun with at least 6–8 hours of direct sunlight daily.
  2. Soil: Well-draining, fertile soil with a pH of 5.5–6.5.
  3. Air Circulation: Space rows to ensure airflow and prevent fungal diseases.
  4. Protection: Avoid low-lying areas prone to frost or standing water.

Tip: Raised beds or mounded rows improve drainage and reduce root rot risk.


Step 3: Preparing the Soil

Proper soil preparation is essential for strong raspberry plants:

  • Clear the Area: Remove weeds, grass, and debris.
  • Loosen Soil: Till to a depth of 12–18 inches to encourage root development.
  • Amend Soil: Incorporate compost or well-rotted manure to boost fertility.
  • Adjust pH: Use lime or sulfur to reach the desired pH level if needed.

Tip: Good soil preparation supports vigorous growth and higher fruit yields.


Step 4: Planting Raspberries

Raspberries can be planted from bare-root canes or nursery-bought plants:

Planting Bare-Root Canes:

  1. Soak roots in water for a few hours before planting.
  2. Dig holes 18–24 inches apart in rows spaced 6–8 feet apart.
  3. Plant canes with roots spread out and soil covering the crown at ground level.
  4. Water thoroughly to settle soil around roots.

Planting Potted Plants:

  1. Dig holes slightly larger than the root ball.
  2. Maintain the same soil level as in the pot.
  3. Water well after planting.

Tip: Mulch around the base with straw or wood chips to conserve moisture and suppress weeds.


Step 5: Watering and Mulching

Consistent moisture is crucial for raspberry growth:

  • Water 1–2 inches per week, especially during flowering and fruit development.
  • Avoid overhead watering to reduce fungal infections.
  • Mulch with organic material to retain moisture, regulate temperature, and control weeds.

Tip: Drip irrigation is ideal for keeping soil evenly moist without wetting foliage.


Step 6: Fertilization

Raspberries benefit from balanced nutrition:

  • Apply balanced fertilizer (10-10-10) in early spring as new growth begins.
  • Side-dress with compost or aged manure during the growing season.
  • Avoid excessive nitrogen, which can promote lush foliage at the expense of fruit.

Tip: Regular feeding encourages healthy canes, abundant flowers, and high-quality fruit.


Step 7: Pruning and Training

Pruning is essential to manage growth, prevent disease, and improve fruit production:

  • Summer-Bearing Raspberries: Remove old fruiting canes after harvest; leave new canes for next year.
  • Ever-Bearing Raspberries: Cut back old canes in late winter and selectively prune to encourage new growth.
  • Training: Use trellises or supports to keep canes upright and improve airflow.

Tip: Proper pruning reduces overcrowding and maximizes sunlight exposure to all canes.


Step 8: Pest and Disease Management

Raspberries are susceptible to pests and diseases, but preventive measures reduce risks:

  • Common Pests: Aphids, spider mites, and raspberry cane borers. Control with insecticidal soaps or neem oil.
  • Fungal Diseases: Botrytis, powdery mildew, and root rot. Ensure proper spacing, avoid overwatering, and remove infected canes.
  • Bird Protection: Cover plants with netting to prevent birds from eating berries.

Tip: Early detection and preventive measures are more effective than treating severe infestations.


Step 9: Harvesting Raspberries

Raspberries are ready to harvest when:

  • The fruit is fully colored, soft, and easily detaches from the cane.
  • Harvest in the morning for the freshest berries.
  • Pick every 2–3 days during peak season to encourage continued production.

Tip: Handle berries gently as they are delicate and prone to bruising.


Step 10: Seasonal Considerations and Winter Care

  • Winter Protection: Apply mulch or straw to protect roots from freezing temperatures.
  • Spring Growth: Remove winter mulch after danger of frost has passed.
  • Summer Care: Ensure adequate water and monitor for pests.
  • Fall Maintenance: Clean up fallen leaves and prune canes as needed.

Tip: Raspberries are hardy, but seasonal maintenance ensures healthy plants and abundant fruit year after year.


Final Thoughts

Growing raspberries at home provides a rewarding combination of beauty, flavor, and nutrition. By following these step-by-step guidelines, gardeners can establish productive raspberry plants that offer sweet treats for years to come.

Key takeaways for successful raspberry cultivation:

  1. Select the right variety and plant in full sun with well-draining soil.
  2. Prepare soil carefully and provide adequate water and mulch.
  3. Fertilize appropriately and prune regularly to maintain plant health.
  4. Monitor for pests and diseases and implement preventive strategies.
  5. Harvest frequently and handle berries gently to enjoy the freshest fruit.

Raspberries are more than just a fruit—they are a symbol of patience, care, and the rewards of home gardening. With consistent attention and proper cultivation, home gardeners can enjoy delicious, fresh raspberries straight from their backyard, enhancing meals and providing a natural, healthy treat for the whole family.

How to Grow Apple Trees from Seeds for Beginners

How to Grow Apple Trees from Seeds for Beginners

Apple trees (Malus domestica) are one of the most beloved fruit trees worldwide. Known for their crisp, sweet fruit and ornamental blossoms, apple trees are a rewarding addition to any garden. While apple trees are commonly propagated through grafting, growing them from seeds is an exciting and educational option for beginners. It allows gardeners to experience the entire life cycle of a tree, from seed to fruit-bearing maturity.

This article provides a step-by-step guide for beginners to grow apple trees from seeds, covering seed selection, stratification, germination, planting, care, and long-term maintenance. By following these instructions, even novice gardeners can enjoy the satisfaction of nurturing apple trees at home.


Why Grow Apple Trees from Seeds?

Growing apple trees from seeds has several advantages:

  1. Educational Experience: Observing the tree’s growth from seed provides insight into plant development.
  2. Cost-Effective: Seeds are inexpensive compared to purchasing nursery-grown saplings.
  3. Experimentation: Growers can experiment with different apple varieties and learn about cross-pollination.
  4. Sustainable Gardening: Seed-grown trees promote home gardening and self-sufficiency.

Tip: Apple trees grown from seeds may not produce the exact same fruit as the parent tree due to genetic variability. Patience and care are essential.


Step 1: Selecting Apple Seeds

Not all seeds are viable for germination. Follow these guidelines:

  • Choose fresh seeds from mature apples. Seeds from old or dried fruit may not germinate.
  • Select healthy, disease-free apples to avoid introducing pathogens.
  • Wash seeds thoroughly to remove sugar and fruit residues.
  • Optional: Dry seeds for a few days before stratification.

Tip: Avoid seeds from hybrid apples if you want to maintain predictable growth traits.


Step 2: Stratification (Cold Treatment)

Apple seeds require cold stratification to break dormancy and stimulate germination:

  1. Wrap cleaned seeds in a moist paper towel.
  2. Place the towel in a plastic bag or container with ventilation.
  3. Refrigerate at 34–41°F (1–5°C) for 6–8 weeks.
  4. Keep the towel slightly damp, not soaked, to prevent mold growth.

Tip: Stratification mimics winter conditions, preparing seeds to sprout in spring.


Step 3: Germination

After stratification, seeds are ready to germinate:

  1. Fill small pots or seed trays with light, well-draining soil.
  2. Plant seeds about 1/2 inch deep in the soil.
  3. Water gently to keep soil moist.
  4. Place containers in a warm, sunny location with indirect sunlight (65–75°F / 18–24°C).
  5. Germination typically occurs within 1–3 weeks.

Tip: Use a clear plastic cover to maintain humidity and warmth, but remove it once sprouts emerge.


Step 4: Caring for Seedlings

Young apple seedlings require attentive care:

  • Light: Provide at least 6 hours of sunlight daily. If indoors, consider grow lights.
  • Watering: Keep soil consistently moist but avoid waterlogging.
  • Fertilization: Begin with a diluted, balanced fertilizer after 4–6 weeks.
  • Thinning: If multiple seeds germinate in one pot, thin to the strongest seedling.

Tip: Healthy seedlings have vibrant green leaves, strong stems, and steady growth.


Step 5: Transplanting Outdoors

When seedlings are 6–12 inches tall and robust, they can be moved outdoors:

  1. Harden off seedlings by gradually exposing them to outdoor conditions over 1–2 weeks.
  2. Choose a sunny location with well-draining soil.
  3. Space trees at least 15–20 feet apart to allow room for growth.
  4. Dig a hole slightly larger than the root ball and plant at the same depth as in the pot.
  5. Water thoroughly after planting.

Tip: Avoid transplanting in extreme heat or frost conditions to reduce stress on seedlings.


Step 6: Long-Term Care

Caring for apple trees involves consistent attention to watering, fertilization, pruning, and disease management:

1. Watering

  • Young trees need 1–2 inches of water per week.
  • Reduce watering as trees mature, but maintain regular moisture during dry periods.

2. Fertilization

  • Apply balanced fertilizer in early spring and mid-summer.
  • Avoid excessive nitrogen, which encourages leafy growth at the expense of fruit.

3. Pruning

  • Prune trees in late winter or early spring to shape branches and remove dead or crossing limbs.
  • Encourage strong central leader growth for structural stability.

4. Mulching

  • Apply organic mulch around the base to retain soil moisture and regulate temperature.
  • Keep mulch away from the trunk to prevent rot.

5. Pest and Disease Control

  • Monitor for aphids, codling moths, apple maggots, and fungal diseases.
  • Use natural remedies, traps, or approved organic treatments for pest management.

Tip: Regular monitoring and maintenance are crucial to prevent problems and ensure healthy growth.


Step 7: Patience and Expectations

Apple trees grown from seeds require patience:

  • Time to Fruit: Seed-grown trees may take 6–10 years to bear fruit.
  • Genetic Variability: Fruit may differ from the parent apple in taste, size, and color.
  • Pruning and Care: Proper pruning and fertilization improve tree health and eventual fruit quality.

Tip: Growing apple trees from seeds is more about the journey than immediate fruit production.


Step 8: Enhancing Growth and Fruit Production

Once trees mature, several practices improve growth and fruit yield:

  1. Pollination: Plant multiple apple varieties nearby to improve cross-pollination.
  2. Thinning Fruit: Remove excess fruit to prevent branch breakage and encourage larger apples.
  3. Protecting Blossoms: Use netting or covers to protect flowers from insects and birds.
  4. Soil Testing: Periodically check soil pH and nutrient levels for optimal tree health.

Tip: Maintaining healthy, well-pollinated trees ensures maximum fruit production when the time comes.


Final Thoughts

Growing apple trees from seeds is a rewarding experience that teaches patience, observation, and horticultural skills. While seed-grown trees take longer to bear fruit and may produce variable apples, they offer a unique educational opportunity and the satisfaction of nurturing a tree from its earliest stage.

By following these steps—selecting viable seeds, stratifying properly, germinating, caring for seedlings, transplanting, and providing long-term maintenance—beginners can successfully grow apple trees at home.

Key takeaways for beginners:

  1. Choose healthy seeds and properly stratify them for germination.
  2. Provide adequate sunlight, water, and nutrients during early growth.
  3. Transplant seedlings carefully and ensure proper spacing.
  4. Maintain long-term care through watering, pruning, and pest management.
  5. Be patient—seed-grown apple trees reward perseverance with growth, beauty, and eventually fruit.

Apple trees from seeds are a living testament to growth, patience, and the joys of home gardening. With care, diligence, and attention to detail, even novice gardeners can cultivate healthy apple trees that enhance their gardens and eventually provide delicious, homegrown fruit.

Easy Solutions to Eliminate Plant Gnats Indoors

Easy Solutions to Eliminate Plant Gnats Indoors

Indoor plants bring beauty, oxygen, and tranquility to homes, but they can sometimes attract unwanted pests, including fungus gnats. These small, dark-colored flies are common in houseplants with moist soil. While adult gnats may be harmless, their larvae feed on roots, potentially damaging plants and hindering growth.

Eliminating plant gnats requires understanding their life cycle, identifying infestation signs, and implementing a combination of cultural, biological, and chemical controls. This article provides a comprehensive guide to solving indoor plant gnat problems, ensuring healthy plants and a pest-free home.


Understanding Plant Gnats

Fungus gnats (family Sciaridae) are small, flying insects that thrive in moist environments:

  • Appearance: Adults are tiny, dark flies, about 1/8 inch long, often seen hovering near soil.
  • Life Cycle: Females lay eggs in damp soil. Larvae feed on organic matter and plant roots for 2–3 weeks before pupating.
  • Damage: Larvae can stunt growth, cause yellowing, and make plants more susceptible to disease.

Tip: Controlling gnats early prevents damage to delicate indoor plants and reduces the likelihood of infestation spreading.


Step 1: Identifying Gnat Infestation

Early detection is crucial:

  • Adult Flies: Small flies hovering around the soil surface or near pots.
  • Larvae: Tiny, white or translucent worms in the top inch of soil.
  • Plant Symptoms: Yellowing leaves, slow growth, or root damage.
  • Sticky Traps: Yellow sticky traps catch adult gnats and help monitor infestation levels.

Tip: Inspect your indoor plants weekly for signs of gnats, especially during high humidity or frequent watering.


Step 2: Cultural Solutions

Cultural practices are the first line of defense against gnats:

1. Adjust Watering Practices

  • Avoid overwatering, as gnats thrive in damp soil.
  • Allow the top 1–2 inches of soil to dry out between watering.
  • Water plants from the bottom to keep surface soil dry.

2. Improve Soil Drainage

  • Use well-draining soil mixes to reduce excess moisture.
  • Consider adding perlite or sand to improve aeration.

3. Remove Organic Debris

  • Clear fallen leaves and dead plant material from soil surfaces.
  • Avoid leaving decaying matter in pots, which serves as a breeding ground.

4. Repotting

  • Repot severely infested plants with fresh, sterile soil.
  • Clean the pot thoroughly before replanting.

Tip: Maintaining proper moisture and hygiene significantly reduces gnat populations without chemicals.


Step 3: Physical Control Methods

Physical measures help reduce adult gnats and larvae:

1. Sticky Traps

  • Yellow sticky traps attract and capture flying adults.
  • Place traps near soil surfaces and around plant areas.

2. Soil Barriers

  • Cover soil with a layer of sand, gravel, or decorative stones.
  • This creates a dry surface layer that prevents females from laying eggs.

3. Bottom Watering

  • Reduces surface moisture and makes the environment less hospitable for egg-laying.

Tip: Combining sticky traps with soil barriers effectively controls adult gnats while preventing new larvae from developing.


Step 4: Biological Control Solutions

Biological methods target gnats without harming plants or humans:

1. Beneficial Nematodes

  • Steinernema feltiae nematodes attack gnat larvae in the soil.
  • Apply to moist soil according to package instructions.

2. Predatory Insects

  • Hypoaspis mites or predatory beetles feed on larvae in the soil.

3. Bacillus thuringiensis israelensis (Bti)

  • A naturally occurring bacterium that kills larvae when ingested.
  • Safe for plants, pets, and humans.

Tip: Biological controls are especially useful for persistent infestations and for organic gardening enthusiasts.


Step 5: Natural and Home Remedies

Several natural remedies help control gnats:

1. Cinnamon

  • Sprinkle ground cinnamon on the soil surface; it has antifungal properties and reduces larvae.

2. Apple Cider Vinegar Traps

  • Place a dish with apple cider vinegar, water, and a drop of dish soap near infested plants.
  • Attracts adult gnats and traps them.

3. Hydrogen Peroxide Solution

  • Mix 1 part 3% hydrogen peroxide with 4 parts water and water the soil.
  • Kills larvae without harming plants when used correctly.

4. Neem Oil

  • Dilute neem oil and water plants lightly to reduce larvae and deter adults.

Tip: These methods are safe, inexpensive, and environmentally friendly. Regular application is key for effectiveness.


Step 6: Chemical Control Options

Chemical control should be a last resort, used only for severe infestations:

  • Insecticidal Soaps: Effective against adult gnats.
  • Systemic Soil Insecticides: Target larvae in the soil; follow label instructions carefully.
  • Pyrethrin Sprays: Can reduce adult populations temporarily.

Tip: Avoid overusing chemicals indoors to prevent harm to humans, pets, and beneficial insects.


Step 7: Preventing Future Infestations

Prevention is more effective than repeated treatments:

  1. Proper Watering: Avoid overwatering; let soil dry slightly between watering.
  2. Soil Hygiene: Remove fallen leaves and organic debris regularly.
  3. Sterile Soil: Use fresh, sterile potting mix when repotting plants.
  4. Quarantine New Plants: Inspect and treat new plants before introducing them to indoor spaces.
  5. Air Circulation: Ensure adequate airflow to keep soil surfaces dry and reduce humidity.

Tip: Regular monitoring and proactive practices keep indoor plants healthy and gnat-free year-round.


Step 8: Companion Planting and Natural Deterrents

Some plants naturally repel gnats and can be grown alongside susceptible houseplants:

  • Basil: Repels many small flying insects.
  • Lavender: Strong scent deters gnats and other pests.
  • Mint: Acts as a natural insect deterrent; use in pots to control gnats.

Tip: Companion planting not only enhances indoor aesthetics but also provides a natural pest barrier.


Final Thoughts

Indoor plant gnats are a common nuisance, but they can be controlled effectively with the right combination of cultural, physical, biological, and natural methods. The key to success is early detection, consistent preventive practices, and proper soil and watering management.

By following the steps outlined in this guide:

  1. Monitor plants regularly and identify gnats early.
  2. Adjust watering practices and improve soil drainage.
  3. Use physical barriers and sticky traps to reduce adult populations.
  4. Employ biological controls or safe home remedies to target larvae.
  5. Practice preventive measures to avoid recurring infestations.

Gardeners can maintain healthy, thriving indoor plants without relying heavily on chemical solutions. With patience, consistency, and a combination of these strategies, indoor plants can flourish, providing beauty, air purification, and fresh greenery without the annoyance of gnats.

Plant gnats may be small, but with careful management, their impact on indoor gardening can be minimized, ensuring a clean, vibrant, and pest-free indoor environment.

Growing Green Onions at Home for Fresh Cooking

Growing Green Onions at Home for Fresh Cooking

Green onions (Allium fistulosum), also known as scallions or spring onions, are a versatile and flavorful addition to any kitchen. They are prized for their mild taste, crisp texture, and year-round availability. Unlike mature onions, green onions can be harvested quickly and continuously, making them ideal for home gardens. Growing green onions at home ensures fresh, nutrient-rich produce that enhances everyday cooking, from salads to soups and garnishes.

This article provides a comprehensive guide on growing green onions at home, covering soil preparation, planting, watering, fertilization, pest management, and harvesting. By following these steps, gardeners can enjoy a steady supply of fresh green onions without relying on store-bought varieties.


Why Grow Green Onions at Home?

Growing green onions at home has numerous advantages:

  1. Continuous Harvest: Green onions can be harvested multiple times as they regrow quickly.
  2. Freshness and Flavor: Homegrown scallions are more flavorful than store-bought ones.
  3. Easy to Grow: They are low-maintenance and suitable for beginners.
  4. Space Efficiency: Can be grown in containers, garden beds, or even kitchen windowsills.
  5. Health Benefits: Rich in vitamins A, C, and K, and contain antioxidants that support overall health.

Choosing the Right Green Onion Variety

Several varieties of green onions are well-suited for home gardening:

  • Evergreen Bunching Onions: Ideal for continuous harvesting; they don’t form large bulbs.
  • White Lisbon: Fast-growing with mild flavor, suitable for containers and raised beds.
  • Tokyo Long White: Produces long, tender stalks; ideal for culinary use.

Tip: Select a variety based on growth speed, flavor preference, and available growing space.


Preparing Soil for Planting

Green onions thrive in well-draining, fertile soil:

  1. Soil Type: Loamy or sandy soils are ideal. Avoid compacted clay soils.
  2. pH Level: Slightly acidic to neutral soil (6.0–7.0).
  3. Soil Enrichment: Incorporate compost or well-rotted manure to improve fertility and moisture retention.
  4. Raised Beds and Containers: Excellent options for gardeners with limited space or poor soil drainage.

Tip: Loose soil encourages straight, tender stalks and prevents bulb deformity.


Planting Green Onions

Green onions can be grown from seeds, sets, or transplants:

1. From Seeds:

  • Sow seeds indoors 6–8 weeks before transplanting, or directly in garden beds after the last frost.
  • Plant seeds 1/4–1/2 inch deep and cover lightly with soil.
  • Keep soil moist and warm (60–75°F / 15–24°C).
  • Germination occurs in 7–14 days.

2. From Sets or Bulbs:

  • Plant small onion sets 1–2 inches deep with pointed ends up.
  • Space 2–3 inches apart for optimal growth.

3. From Transplants:

  • Seedlings with 3–4 leaves can be transplanted outdoors.
  • Space them 2–3 inches apart and 12 inches between rows for good airflow.

Tip: Green onions are shallow-rooted, so planting depth and spacing are important for healthy growth.


Providing Sunlight

Green onions require full sun for optimal growth:

  • Ensure at least 6 hours of direct sunlight daily.
  • In hot climates, provide partial shade during afternoon hours to prevent heat stress.

Tip: Sunlight affects the color and tenderness of the stalks—more sun produces stronger, flavorful plants.


Watering and Moisture Management

Consistent moisture is crucial for green onions:

  • Water plants evenly to keep the soil moist but not waterlogged.
  • Avoid overhead watering to reduce the risk of fungal diseases.
  • Mulch around plants with straw or organic material to conserve soil moisture, regulate temperature, and suppress weeds.

Tip: Green onions respond well to deep, frequent watering during dry periods to encourage rapid growth.


Fertilization

Green onions are light feeders but benefit from additional nutrients:

  • Apply balanced, water-soluble fertilizer every 3–4 weeks.
  • Side-dress with compost or organic fertilizer to maintain soil fertility.
  • Avoid over-fertilizing with nitrogen, which can produce excessive leafy growth without strengthening the stalks.

Tip: Fertilization supports continuous regrowth, ensuring a steady supply of green onions.


Controlling Pests and Diseases

Green onions are generally resilient, but some issues can arise:

  • Thrips: Small insects that feed on leaves; control with insecticidal soap or neem oil.
  • Onion Maggots: Larvae can damage roots; practice crop rotation and use floating row covers.
  • Fungal Diseases: Ensure proper spacing and good air circulation to prevent downy mildew and leaf blight.

Tip: Companion planting with carrots, lettuce, or herbs can reduce pest pressure naturally.


Harvesting Green Onions

One of the benefits of growing green onions is frequent harvesting:

  • Begin harvesting when stalks reach 6–8 inches in height.
  • Cut stalks at the base, leaving 1–2 inches to encourage regrowth.
  • Harvest every 7–14 days for continuous production.
  • Mature onions can be left to grow bulbs if desired, but the focus is usually on tender stalks.

Tip: Regular harvesting promotes healthier plants and prevents overcrowding.


Growing Green Onions in Containers

Containers are perfect for small spaces, balconies, or indoor growing:

  • Use pots at least 6 inches deep with drainage holes.
  • Fill with light, well-draining potting mix enriched with compost.
  • Water consistently and place containers in sunny locations.
  • Fertilize lightly every few weeks to maintain nutrient levels.

Tip: Green onions grow well indoors on sunny windowsills, making them accessible year-round.


Companion Planting

Green onions are excellent companion plants:

  • Repel Pests: Protect carrots, tomatoes, and peppers from aphids and other insects.
  • Interplanting: Can be grown alongside lettuce, spinach, or radishes without competing for nutrients.
  • Natural Benefits: Enhances soil health and reduces disease incidence in nearby plants.

Seasonal Considerations

  • Spring and Fall Planting: Ideal in most regions, providing continuous harvests.
  • Summer Planting: Requires regular watering to prevent heat stress.
  • Winter Growing: In mild climates, green onions can be grown year-round in raised beds or containers.

Final Thoughts

Growing green onions at home is a rewarding endeavor that combines ease of cultivation, nutritional benefits, and culinary versatility. By following the steps outlined—selecting the right variety, preparing fertile soil, planting correctly, providing sunlight, maintaining moisture, and practicing pest control—gardeners can enjoy fresh, flavorful green onions throughout the year.

Key takeaways for a bountiful harvest:

  1. Use seeds, sets, or transplants according to your growing conditions.
  2. Ensure full sun exposure and consistent watering.
  3. Space plants properly to allow airflow and healthy growth.
  4. Fertilize lightly and regularly for continuous production.
  5. Harvest frequently to encourage regrowth and maintain plant health.

Green onions are more than just a kitchen staple—they are an accessible, productive, and sustainable crop that transforms home gardening into a practical and flavorful experience. By growing your own, you ensure a steady supply of fresh, crisp, and aromatic onions for salads, soups, stir-fries, and garnishes, elevating everyday cooking with homegrown freshness.