How to Care for a Jade Plant in Any Climate

How to Care for a Jade Plant in Any Climate

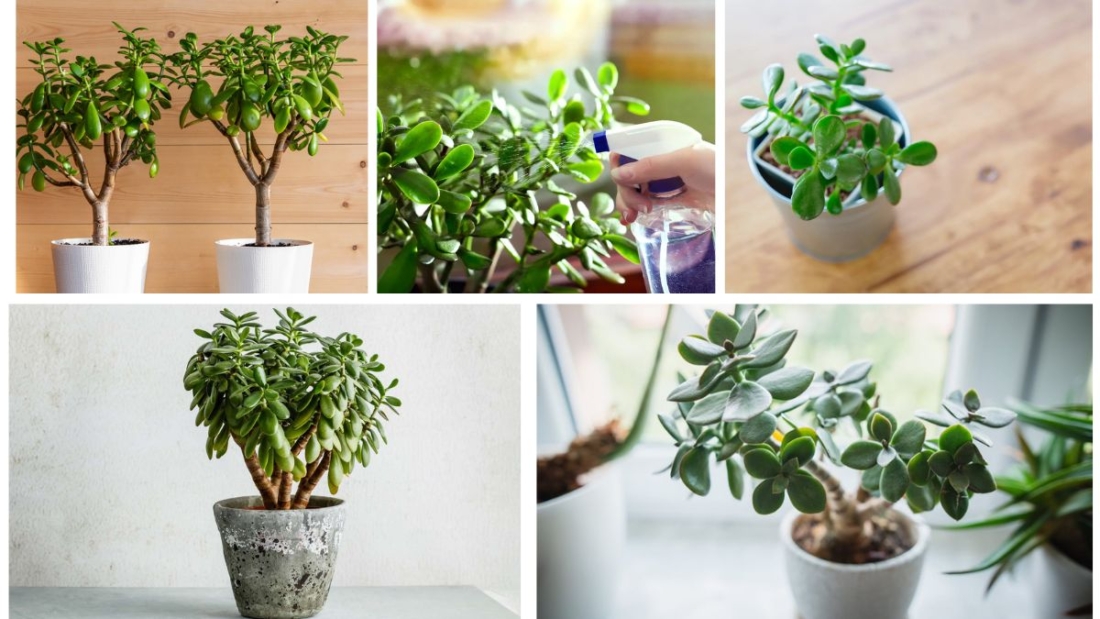
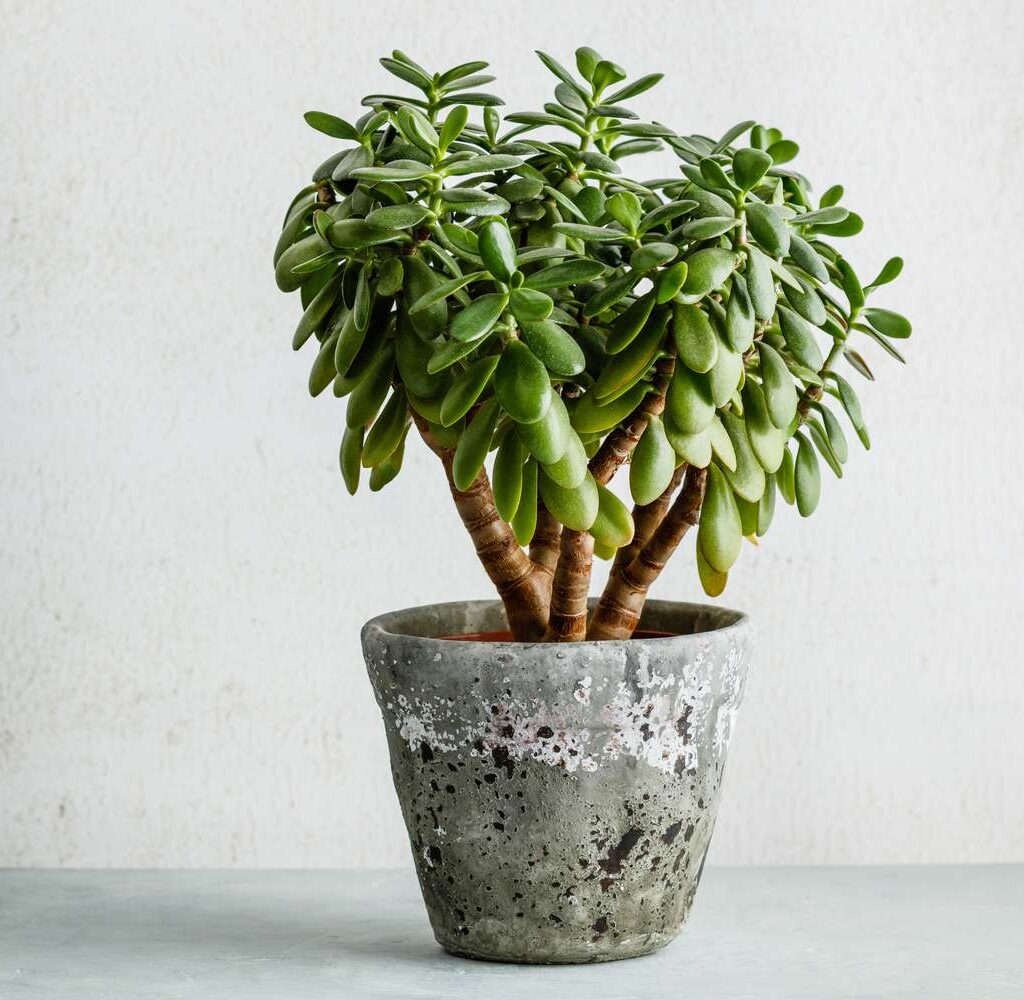
The jade plant (Crassula ovata), also known as the “money plant” or “lucky plant,” is one of the most beloved succulents worldwide. Its glossy, oval-shaped leaves, thick stems, and reputation as a symbol of prosperity make it a favorite for both beginners and seasoned plant lovers. Native to South Africa and Mozambique, the jade plant has adapted to thrive in diverse environments, making it an excellent choice for growing indoors or outdoors.

But like all plants, jade plants have unique needs, and understanding how to care for them across different climates is key to keeping them healthy and long-living. In fact, with proper care, jade plants can live for decades and even grow into small tree-like forms. This guide will walk you through everything you need to know about planting, caring for, and maintaining jade plants so they thrive in any climate.


1. Understanding the Jade Plant

Jade plants are succulents, meaning they store water in their leaves and stems. This adaptation helps them survive in dry, arid regions with little rainfall. They are relatively low-maintenance, but they require specific conditions to grow well, especially when climates vary.

Key Characteristics of Jade Plants:

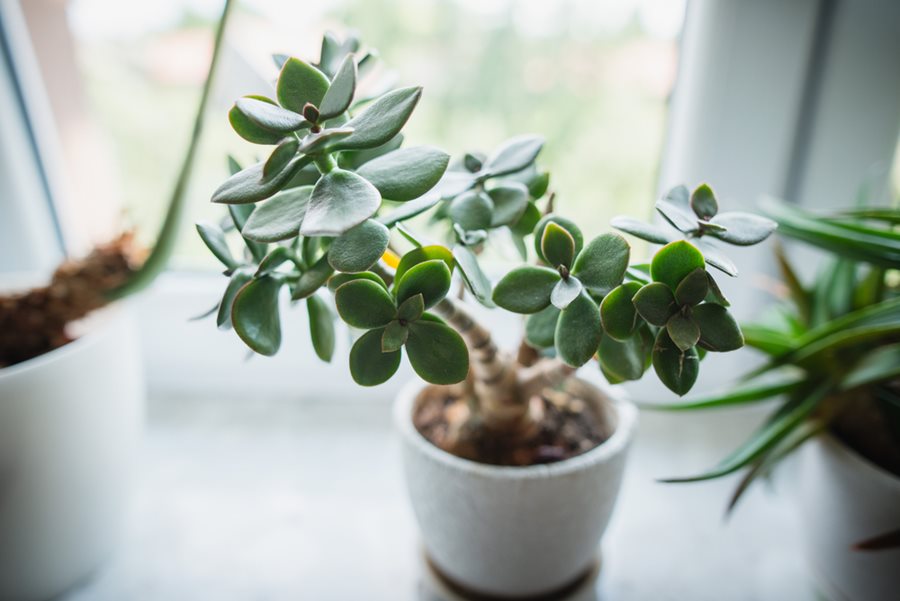
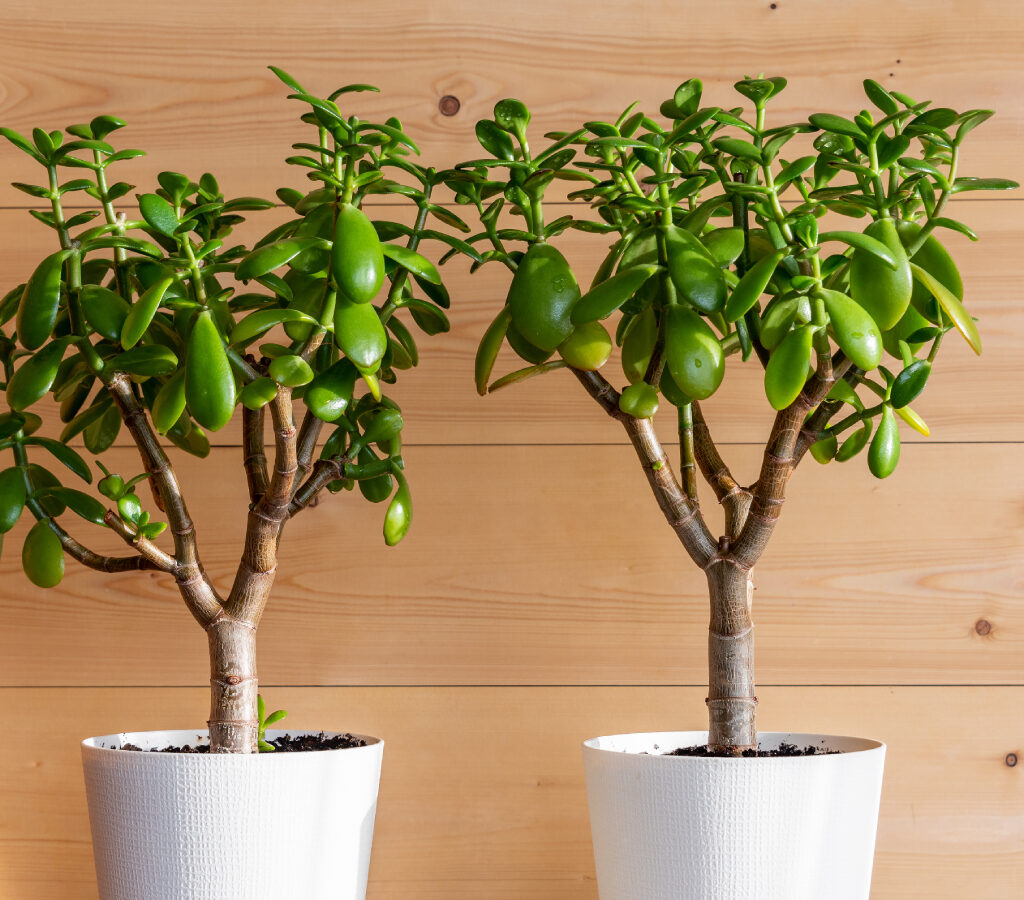
  • Thick, fleshy green leaves, sometimes with red edges when exposed to sunlight.
  • Woody stems that can make the plant resemble a miniature tree.
  • Slow-growing but long-living (many can survive 50–70 years with care).
  • Flowers in clusters of star-shaped, white or pink blooms, usually in winter under the right conditions.

2. Planting Your Jade Plant

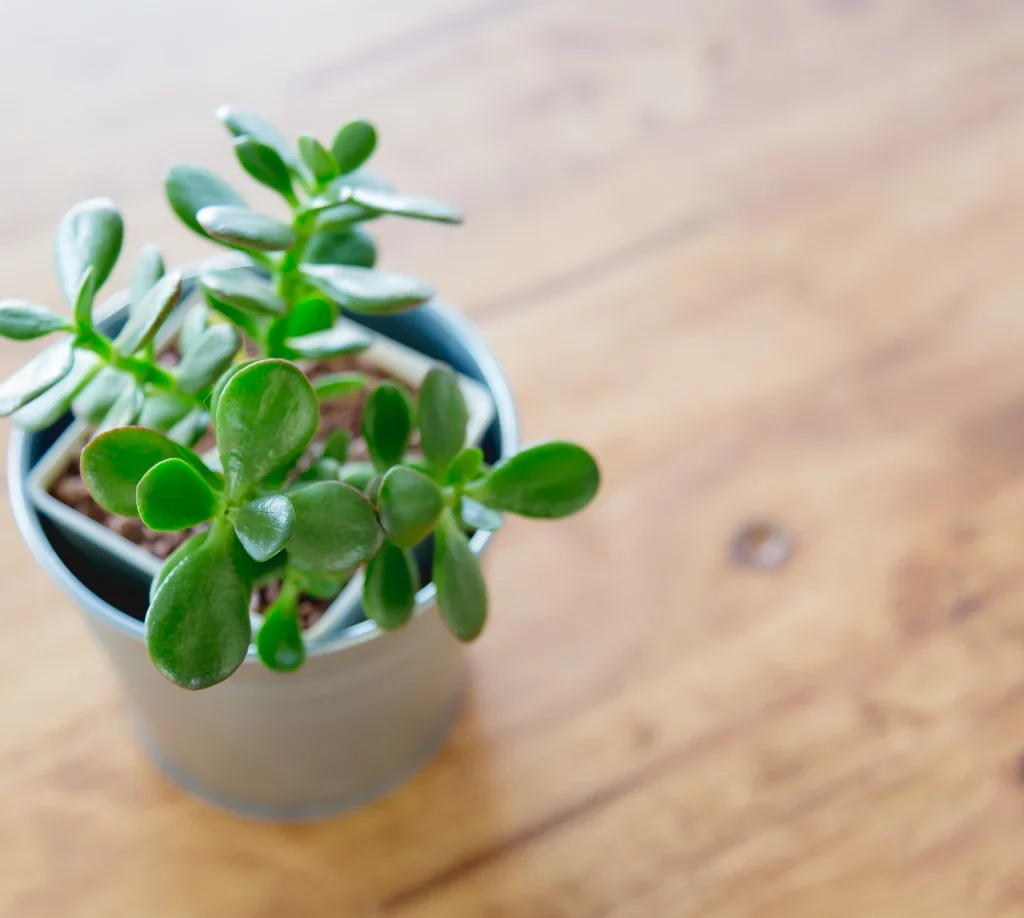
Choosing the Right Pot

Jade plants prefer containers with excellent drainage. A clay or terracotta pot is ideal because it allows excess moisture to evaporate, reducing the risk of root rot. Make sure your pot has drainage holes.

Soil Requirements

Jade plants thrive in succulent or cactus soil mix. If you’re making your own mix, combine:

  • 2 parts potting soil
  • 1 part perlite or pumice
  • 1 part coarse sand

This ensures proper drainage while providing enough nutrients for growth.

Planting Steps

  1. Fill the pot with your prepared soil mix.
  2. Place the jade plant in the center and spread its roots evenly.
  3. Add soil around the base, gently pressing to secure the plant.
  4. Water lightly after planting, then allow the soil to dry before the next watering.

3. Watering Jade Plants

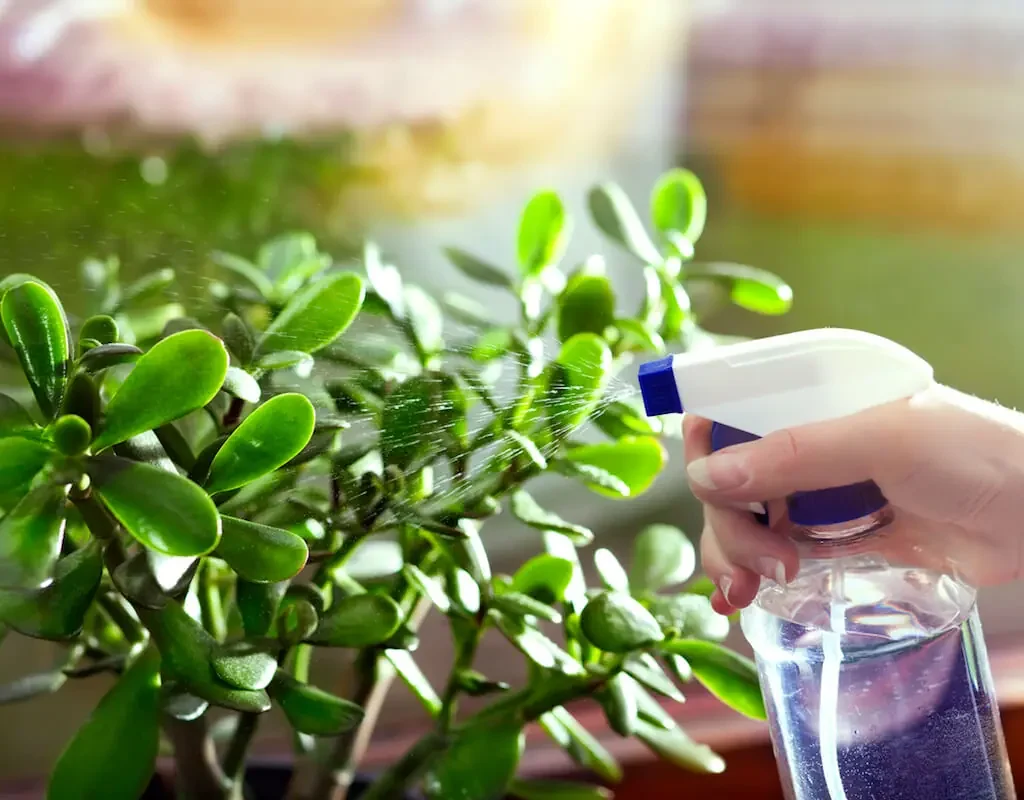
Overwatering is the most common cause of jade plant problems. Since they are succulents, they need much less water than most houseplants.

Watering Guidelines by Climate:

  • Hot, Dry Climates: Water once every 1–2 weeks during the growing season (spring and summer). In extreme heat, monitor the soil and water when dry.
  • Cool or Humid Climates: Water less frequently, perhaps every 2–3 weeks, to avoid waterlogging.
  • Winter Dormancy: Jade plants grow slowly in winter and need minimal water—once every 3–4 weeks is usually enough.

Tip: Always check the soil. If the top 2 inches are dry, it’s time to water.


4. Light Requirements

Jade plants love sunlight, but the amount they need depends on the climate.

  • Warm Climates: Place them in a location with partial sun to avoid sunburn. Morning sun and afternoon shade work best.
  • Cooler Climates: They can handle full sun and may even develop red-tinted leaf edges from exposure.
  • Indoors: Place them near a bright, south-facing window for 4–6 hours of direct sunlight daily. If natural light is limited, consider using a grow light.

5. Fertilizing Jade Plants

Jade plants are not heavy feeders, but they benefit from occasional fertilization.

  • Use a balanced, water-soluble fertilizer (10-10-10) diluted to half-strength.
  • Fertilize once every 4–6 weeks during the growing season (spring and summer).
  • Avoid fertilizing in winter when the plant is dormant.

6. Pruning and Shaping

Pruning helps jade plants grow into attractive shapes and prevents them from becoming too leggy.

  • Use clean, sharp scissors or pruning shears.
  • Cut above a leaf node to encourage branching.
  • Remove dead or shriveled leaves regularly.
  • For a bonsai-like look, selectively prune to create a tree form.

Pruning also helps increase airflow around the plant, reducing the risk of pests and fungal issues.


7. Repotting Jade Plants

Jade plants don’t need frequent repotting because they grow slowly. Every 2–3 years, repot into fresh soil to replenish nutrients and check for root health.

Steps to Repot:

  1. Gently remove the plant from its old pot.
  2. Trim away any rotting or dead roots.
  3. Place it in a slightly larger pot with fresh soil mix.
  4. Allow the plant to adjust before watering again.

8. Pest and Disease Management

While jade plants are hardy, they can still be affected by pests and diseases.

Common Issues:

  • Mealybugs: Appear as white, cottony patches. Remove with a cotton swab dipped in rubbing alcohol.
  • Spider Mites: Look for webbing and yellow spots on leaves. Use neem oil spray for treatment.
  • Root Rot: Caused by overwatering. Remove affected roots and replant in fresh soil.
  • Leaf Drop: Usually due to underwatering, sudden temperature changes, or poor lighting.

9. Caring for Jade Plants in Different Climates

Tropical and Warm Climates

  • Provide partial shade to prevent leaf burn.
  • Increase watering frequency during hot months.
  • Watch for fungal issues due to humidity.

Cool and Temperate Climates

  • Keep the plant in bright, direct sunlight.
  • Protect from frost by bringing it indoors in winter.
  • Reduce watering drastically during dormancy.

Dry, Desert-Like Climates

  • Jade plants thrive naturally in such regions.
  • Ensure occasional deep watering to replenish stored moisture.
  • Mulching around the base (if planted outdoors) helps retain soil moisture.

Cold Climates

  • Jade plants cannot tolerate freezing temperatures. If you live in such regions, keep them indoors during winter.
  • Place them near sunny windows or use artificial grow lights.
  • Maintain indoor humidity at moderate levels.

10. Propagating Jade Plants

One of the best things about jade plants is how easy they are to propagate.

Leaf Cuttings

  1. Remove a healthy leaf from the plant.
  2. Let it dry for a few days until the cut end forms a callus.
  3. Place it on top of moist succulent soil.
  4. Roots will start developing in 2–4 weeks.

Stem Cuttings

  1. Cut a 3–4 inch healthy stem.
  2. Let it dry for 3–5 days.
  3. Plant in well-draining soil.
  4. Water sparingly until roots are established.

This makes jade plants a wonderful gift plant, symbolizing luck and prosperity.


11. Seasonal Care

  • Spring and Summer (Growing Season): Provide plenty of sunlight, regular watering, and monthly fertilization.
  • Fall: Gradually reduce watering and prepare the plant for dormancy.
  • Winter (Dormant Season): Keep indoors in colder climates, water sparingly, and avoid fertilizing.

12. Benefits of Having a Jade Plant

  • Aesthetic Appeal: Adds greenery and elegance to homes and offices.
  • Air Purification: Helps remove toxins and improves air quality.
  • Symbolism: Associated with wealth, prosperity, and good fortune.
  • Longevity: A jade plant can be passed down through generations.

Conclusion

Caring for a jade plant in any climate comes down to three essentials: proper watering, adequate sunlight, and well-draining soil. With these basics in place, jade plants can adapt to various environments and reward you with decades of beauty, charm, and even symbolic prosperity.

Whether you live in a dry desert, a humid tropical region, or a cold temperate zone, jade plants can thrive with the right adjustments in care. By following these guidelines, you’ll not only keep your jade plant healthy but also enjoy its timeless appeal for years to come.

How Often to Water Your Snake Plant for Optimal Growth

How Often to Water Your Snake Plant for Optimal Growth

The snake plant (Sansevieria trifasciata), also known as “mother-in-law’s tongue,” is one of the most popular houseplants worldwide because of its striking sword-shaped leaves, air-purifying qualities, and minimal care requirements. While it is a hardy plant that can withstand a variety of conditions, one of the most common mistakes people make is overwatering or underwatering. Striking the right balance is essential to ensure optimal growth, vibrant leaves, and long-lasting health. This guide provides an in-depth exploration of how often to water your snake plant, the factors influencing watering frequency, and practical tips for maintaining a thriving plant at home.


Introduction: Why Watering Matters for Snake Plants

Snake plants are succulents, meaning they have adapted to store water in their thick, fleshy leaves to survive in arid environments. Unlike tropical houseplants that thrive in consistently moist soil, snake plants prefer a dry cycle between waterings. Because of this unique adaptation, they can survive neglect but are highly susceptible to root rot if overwatered.

Finding the right watering schedule is crucial, not only for the plant’s survival but also for encouraging steady growth and lush, upright foliage. Beginners often wonder, “How often should I water my snake plant?” The answer isn’t fixed—it depends on several environmental and seasonal factors.


Understanding the Snake Plant’s Natural Habitat

Snake plants originate from West Africa, where they grow in dry, rocky soil and endure long periods of drought. Their leaves act as natural reservoirs, storing water and releasing it gradually during dry spells. This evolutionary background explains why they require less water compared to many other indoor plants. Replicating these natural conditions in your home environment ensures optimal health.


General Watering Rule for Snake Plants

As a general rule, snake plants should be watered every 2–6 weeks, depending on environmental conditions such as season, temperature, humidity, and light exposure. The soil should always be allowed to dry out completely before watering again.

A simple test is the finger test—insert your finger about two inches into the soil. If it feels dry, it’s time to water; if it still feels moist, wait a few more days.


Factors That Affect Watering Frequency

1. Seasonal Changes

  • Spring and Summer: During the growing season, snake plants are more active and may require watering every 2–3 weeks.
  • Fall and Winter: Growth slows significantly, and water needs decrease. Watering once every 4–6 weeks is usually sufficient.

2. Light Exposure

  • Snake plants placed in bright, indirect light tend to dry out faster and need more frequent watering.
  • In low-light conditions, water consumption is lower, and watering can be less frequent.

3. Temperature and Humidity

  • In warm, dry climates, soil loses moisture faster, requiring slightly more frequent watering.
  • In cooler or humid environments, snake plants retain moisture longer, so overwatering is a bigger risk.

4. Pot Size and Material

  • Terracotta pots allow for quicker evaporation, which means plants may need watering sooner.
  • Plastic or ceramic pots retain moisture longer, reducing watering frequency.
  • Smaller pots dry out faster than larger pots, influencing how often you water.

5. Soil Type

  • Well-draining soil is crucial. A mix of cactus soil with added perlite or sand prevents water from sitting at the roots. Poor-draining soil increases the risk of root rot, even if you water sparingly.

Signs of Overwatering vs. Underwatering

Overwatering Symptoms

  • Yellowing leaves starting from the bottom.
  • Mushy, soft, or drooping leaves.
  • Foul odor from soil (a sign of root rot).

Underwatering Symptoms

  • Wrinkled, curling, or crispy leaf edges.
  • Slowed or stunted growth.
  • Leaves losing their firmness and upright shape.

Learning to recognize these signs early allows you to adjust your watering routine and prevent long-term damage.


Step-by-Step Guide to Watering Your Snake Plant

  1. Check the Soil – Always ensure the top 2–3 inches of soil are completely dry.
  2. Water Thoroughly – Pour water slowly into the soil until it drains out from the bottom. Empty the saucer beneath the pot to avoid stagnant water.
  3. Avoid Wetting the Leaves – Water should be directed at the base of the plant, as wet leaves can invite fungal issues.
  4. Use Room-Temperature Water – Cold water can shock the roots, so let tap water sit for a few hours before using it.
  5. Stick to a Routine – Consistency is key, but adjust based on environmental changes.

Seasonal Watering Guide

  • Spring (March–May): Water every 2–3 weeks as the plant begins active growth.
  • Summer (June–August): Water every 2 weeks, especially in hotter regions.
  • Fall (September–November): Reduce to every 3–4 weeks.
  • Winter (December–February): Water every 4–6 weeks, or only when soil is completely dry.

Tips for Beginners

  • Less is More: It’s safer to underwater than overwater a snake plant.
  • Use a Moisture Meter: Helpful for beginners who struggle to gauge soil dryness.
  • Adapt to Your Home: No two homes are the same—observe your plant and adjust accordingly.
  • Rotate Your Plant: Turning your plant occasionally ensures even light exposure and balanced water use.

Common Mistakes to Avoid

  1. Watering on a Fixed Calendar – Snake plants don’t thrive on rigid schedules; soil dryness should guide watering.
  2. Using the Wrong Soil – Heavy, water-retentive soil can suffocate roots.
  3. Letting Water Sit in Saucers – Standing water leads to root rot.
  4. Ignoring Seasonal Needs – Watering the same in winter as in summer is a frequent mistake.

The Role of Humidity and Climate

In tropical or humid regions, snake plants may require watering less frequently since moisture lingers in the air and soil. Conversely, in arid regions or during summer air-conditioning use, soil dries faster, and the plant might need water more often. Understanding your home’s microclimate is essential for success.


Why Proper Watering Ensures Optimal Growth

When watered correctly, snake plants produce strong, upright leaves with vibrant green and yellow variegation. Proper hydration also supports their natural air-purifying abilities, as healthy plants are more efficient at filtering toxins such as formaldehyde and benzene from the air.

Over time, correct watering not only keeps your plant thriving but also promotes flowering—a rare but beautiful occurrence in mature snake plants under ideal conditions.


Conclusion

Watering your snake plant for optimal growth is less about following a strict timetable and more about learning to observe and respond to your plant’s needs. While the general guideline of watering every 2–6 weeks is a good starting point, the actual frequency depends on factors like season, light exposure, temperature, and pot conditions.

By avoiding overwatering, monitoring environmental factors, and adapting your care routine, you’ll be able to enjoy a thriving snake plant that enhances your indoor space with its beauty and resilience. Remember: when in doubt, it’s better to underwater than overwater.

How to Grow a Dragon Fruit Plant at Home: A Complete Beginner’s Guide

How to Grow a Dragon Fruit Plant at Home: A Complete Beginner’s Guide

Dragon fruit, also known as pitaya or pitahaya, is a tropical cactus plant that produces one of the most exotic-looking and nutrient-rich fruits in the world. Its vibrant pink or yellow skin, spiky appearance, and speckled white or red flesh make it a standout both in gardens and on dining tables. Beyond its beauty, dragon fruit is rich in vitamins, antioxidants, and fiber, making it a rewarding plant to grow at home. Fortunately, this tropical cactus is surprisingly adaptable and can be grown successfully in containers, backyards, or small home gardens with the right care.

This guide provides a step-by-step process for beginners, from understanding the plant to nurturing it into a productive, fruit-bearing cactus.


1. Understanding Dragon Fruit Plants

Dragon fruit belongs to the cactus family (Cactaceae) and thrives in warm, tropical, or subtropical climates. Unlike most cacti, dragon fruit prefers more water and partial shade rather than full desert-like conditions. It grows as a climbing cactus with long, fleshy stems that can reach several meters when supported by a trellis.

There are three main types of dragon fruit:

  • Hylocereus undatus – White flesh with pink skin (most common).
  • Hylocereus costaricensis – Red flesh with pink skin (sweeter, less common).
  • Hylocereus megalanthus – White flesh with yellow skin (smaller but very sweet).

Choosing the right variety depends on availability and taste preference, but all follow the same growing requirements.


2. Choosing the Right Location

Dragon fruit plants love warmth and sunlight. For best growth:

  • Select a sunny spot where the plant gets at least 6–8 hours of sunlight daily.
  • If growing indoors, place the plant near a south-facing window or use a grow light.
  • Ensure protection from extreme cold, as dragon fruit does not tolerate frost.

In regions with very hot summers, providing partial shade during midday can prevent sunburn on the stems.


3. Soil Requirements

Being a cactus, dragon fruit needs well-draining soil. Stagnant water can cause root rot quickly. The ideal soil conditions are:

  • Sandy loam or cactus potting mix enriched with organic matter.
  • A slightly acidic to neutral pH (6–7).
  • Raised beds or large containers with good drainage holes work best for beginners.

You can create a homemade mix using:

  • 2 parts garden soil
  • 1 part sand or perlite (for drainage)
  • 1 part compost (for nutrients)

4. Growing Dragon Fruit from Seeds vs. Cuttings

Growing from Seeds

  • Scoop seeds from fresh dragon fruit.
  • Wash and dry them on tissue paper for 24 hours.
  • Sow seeds in a tray with cactus mix, lightly covering them with soil.
  • Mist gently to keep the soil moist until germination (2–3 weeks).

Growing from seeds is fun but slow; fruiting may take 5–7 years.

Growing from Cuttings (Recommended)

  • Take a healthy stem cutting about 8–12 inches long.
  • Let it dry for 5–7 days in a shaded area until the cut end heals (callus formation).
  • Plant the cutting 2–3 inches deep in soil.
  • Water lightly and keep in indirect sunlight until roots develop (2–3 weeks).

Cuttings grow much faster and usually start producing fruit within 1–2 years.


5. Providing Proper Support

Since dragon fruit is a climbing cactus, it needs a structure to grow on. Without support, stems will sprawl on the ground and rot. The best options include:

  • A wooden or concrete post with a crossbar at the top.
  • A trellis or strong fence.
  • Large containers with a built-in support pole.

As the plant grows, tie the stems gently with soft cloth or garden tape to guide them upward.


6. Watering and Fertilizing

Dragon fruit requires more water than desert cacti but is still sensitive to overwatering.

  • Water once or twice a week during the growing season.
  • Let the soil dry slightly between watering.
  • Reduce watering in winter when growth slows.

For fertilizing:

  • Use a balanced fertilizer (10-10-10) every month during the growing season.
  • Add compost or organic manure around the base twice a year.
  • Once the plant matures, switch to a fertilizer higher in phosphorus and potassium to encourage flowering and fruiting.

7. Flowering and Pollination

Dragon fruit plants typically bloom in summer. Their large, fragrant flowers open at night and last only until morning, earning them the nickname “Queen of the Night.”

  • Some varieties are self-pollinating, while others need cross-pollination.
  • If you have only one plant, you may need to hand-pollinate using a soft brush to transfer pollen from one flower to another.
  • Pollination ensures fruit set, and within 30–50 days, you can expect ripe dragon fruits.

8. Caring for Dragon Fruit Plants

To keep your plant healthy and productive:

  • Prune regularly – Remove dead, tangled, or overcrowded stems to improve airflow and sunlight.
  • Mulch around the base – Helps retain soil moisture and suppress weeds.
  • Protect from pests – Common issues include ants, aphids, mealybugs, and snails. Spray with neem oil or organic insecticides if needed.
  • Prevent diseases – Avoid overwatering to prevent fungal root rot and stem rot.

9. Harvesting Dragon Fruit

Dragon fruits are ready to harvest 30–50 days after flowering when:

  • The skin turns bright pink or yellow (depending on the variety).
  • The wings or leafy scales on the skin begin to dry.
  • The fruit feels slightly soft when pressed.

Use a sharp knife to cut the fruit off cleanly, leaving a short stem attached. Handle gently, as dragon fruit bruises easily.


10. Growing Dragon Fruit in Containers

For those with limited space, container gardening works beautifully:

  • Choose a 20–30 gallon pot with drainage holes.
  • Place a strong stake or trellis inside the pot.
  • Keep the container in a warm, sunny spot.
  • Repot every 2–3 years as the plant grows.

Container-grown dragon fruit can thrive and produce equally well if given enough care and nutrition.


11. Benefits of Growing Dragon Fruit at Home

  • Nutritional benefits – Rich in vitamin C, fiber, iron, and antioxidants.
  • Health support – Improves digestion, boosts immunity, and supports heart health.
  • Aesthetic appeal – Adds an exotic, tropical look to gardens.
  • Cost-effective – Fresh dragon fruits are expensive in markets; growing at home saves money.
  • Sustainable gardening – Encourages self-sufficiency and eco-friendly living.

12. Common Mistakes to Avoid

  • Overwatering, which causes root rot.
  • Growing in heavy clay soil without proper drainage.
  • Not providing support for climbing stems.
  • Ignoring pollination requirements.
  • Planting in areas with frost without protection.

Conclusion

Growing a dragon fruit plant at home is both rewarding and practical. With the right soil, support structure, watering schedule, and care, even beginners can successfully cultivate this exotic cactus. Whether you’re planting in a backyard garden or a large container on your balcony, dragon fruit will reward you with its striking flowers and nutritious, delicious fruits.

By following this beginner’s guide, you can transform your home garden into a tropical oasis and enjoy the satisfaction of harvesting fresh dragon fruits right from your own space.

5 Gorgeous Candlelit Flower Beds for Magical Night Gardens

5 Gorgeous Candlelit Flower Beds for Magical Night Gardens

Creating a night garden filled with soft glowing lights and vibrant blooms is one of the most enchanting ways to transform your outdoor space. Candlelit flower beds not only highlight the natural beauty of your plants but also set a dreamy ambiance perfect for evening relaxation, dinner parties, or romantic nights under the stars. Below are five gorgeous candlelit flower bed ideas that will make your garden look like a magical retreat after sunset.


1. Pathway Candlelit Flower Beds

Lining flower beds along your garden path with candles can instantly elevate your outdoor space into a fairy-tale setting. Imagine walking down a softly glowing pathway surrounded by roses, lavender, or jasmine, their fragrance carried in the night breeze. Glass lanterns or hurricane jars protect the candles from the wind while adding elegance to the arrangement. Pairing candlelight with flowering plants enhances their colors and textures, making your nighttime strolls a mesmerizing experience.


2. Floating Candle Flower Beds Around Water Features

If your garden has a pond, fountain, or small pool, surrounding it with flower beds filled with candles creates a truly magical scene. The flickering lights reflect beautifully in the water, amplifying the charm of night-blooming flowers such as moonflowers, evening primrose, or water lilies. Floating candles on the surface add another layer of elegance, transforming your garden into a serene, romantic escape. This design works especially well for evening gatherings or peaceful moments of solitude.


3. Lantern-Infused Raised Flower Beds

Raised flower beds offer an excellent opportunity to incorporate lighting. Embedding candle lanterns among your blooms creates a warm glow that highlights the plants from within. For a romantic garden style, pair vintage iron lanterns with soft pastel flowers such as peonies, hydrangeas, and garden roses. The raised structure allows the candlelight to cascade outward, bathing the entire area in a gentle radiance. This design is both functional and stunning, ensuring your flower beds remain the focal point even after dark.


4. Candlelit Trellis and Climbing Flower Beds

If you love vertical gardens, this design is perfect. Adding candle lanterns or hanging jars to trellises draped with climbing flowers such as clematis, honeysuckle, or climbing roses creates a whimsical atmosphere. The candles illuminate the cascading blossoms, casting romantic shadows on nearby walls and walkways. This layered effect enhances depth and drama, making the entire garden feel like an enchanted hideaway. It’s a wonderful choice for intimate dinner parties or cozy family evenings.


5. Circular Candlelit Centerpiece Flower Beds

A circular flower bed in the middle of your garden becomes truly breathtaking when surrounded by candles. You can use tall candlesticks, lanterns, or even LED candles for safety while planting vibrant blooms such as tulips, lilies, or daisies in the center. The circular design naturally draws the eye, while the glowing ring of lights frames the flowers like a living piece of art. This idea works beautifully as a centerpiece for night gardens, offering a magical glow from every angle.


Final Touch: Candlelit flower beds combine nature, light, and atmosphere in the most enchanting way. Whether along pathways, around water features, or as glowing centerpieces, they bring warmth, romance, and magic to your outdoor space—making every evening in your garden a night to remember.

5 Beautiful Circular Bench Flower Beds for Functional Design

5 Beautiful Circular Bench Flower Beds for Functional Design

A circular bench flower bed is a wonderful way to combine beauty and practicality in your garden. It not only creates a centerpiece of vibrant blooms but also provides a cozy seating area where family and guests can relax. These designs work especially well in both large landscapes and compact gardens, turning the space into a functional retreat. Below are five beautiful circular bench flower bed ideas that merge comfort with garden style.


1. Classic Wooden Bench Around a Tree Flower Bed

A timeless choice, the classic wooden circular bench built around a tree makes your garden both inviting and shaded. Surround the base of the tree with a circular flower bed filled with colorful perennials or seasonal blooms. The tree acts as a natural focal point, while the flowers at its base provide vibrancy and fragrance. This design is perfect for homes with mature trees, creating a peaceful reading spot or a place for quiet reflection in nature.


2. Stone-Bordered Circular Bench with Flower Bed Center

For a rustic yet elegant touch, opt for a circular stone border with a built-in bench. Inside the circle, plant a vibrant mix of flowers like roses, marigolds, or lavender to create contrast with the stone’s natural texture. The stone not only adds durability but also complements outdoor pathways and patios. This design is ideal for luxury gardens or countryside homes, where the mix of earthy tones and floral beauty creates a balanced, welcoming ambiance.


3. Metal-Framed Bench with Contemporary Flower Bed Design

A circular metal-framed bench paired with a modern flower bed gives your garden a sleek, contemporary look. Use raised flower beds in the center, filled with ornamental grasses, succulents, or low-maintenance blooms. The clean lines of the metal bench make the arrangement stand out as a striking architectural feature. This setup is especially suited for modern outdoor spaces where functionality meets minimalism, offering a stylish yet practical garden lounge.


4. Tiered Circular Bench Flower Bed for Extra Depth

A tiered circular flower bed with integrated seating adds depth and drama to your garden design. Multiple levels of planting allow you to showcase a variety of flowers—from cascading petunias on the edges to tall sunflowers or dahlias in the center. The circular bench can be built into one of the tiers, offering a cozy place to sit while surrounded by lush greenery. This design not only maximizes vertical space but also makes your garden look dynamic and layered.


5. Circular Bench with Fragrant Herb and Flower Bed

For a functional and sensory garden addition, consider a circular bench surrounding a flower bed filled with fragrant herbs and blooms. Lavender, rosemary, and thyme can be combined with roses or daisies to create a refreshing aroma. Sitting on the bench becomes an immersive experience, where you can enjoy the sights and scents of the garden at once. This design works beautifully in both small backyards and larger estates, blending charm with usability.


A circular bench flower bed is more than just a decorative element—it’s a multifunctional garden feature that invites relaxation while showcasing vibrant blooms. Whether rustic, modern, or layered, these designs create a luxurious and welcoming outdoor retreat.

5 Gorgeous French Knot Garden Flower Beds for Elegant Layouts

5 Gorgeous French Knot Garden Flower Beds for Elegant Layouts

French knot gardens, with their symmetrical layouts and timeless elegance, are a true reflection of sophistication in landscaping. Characterized by intricate geometric patterns, well-trimmed hedges, and carefully chosen flowers, these gardens bring artistry and order to any outdoor space. Below are five gorgeous French knot garden flower bed ideas that will inspire you to create a luxurious and elegant outdoor retreat.


1. Classic Boxwood-Framed Knot Garden

Nothing says “French elegance” quite like boxwood hedges. A knot garden framed with low, neatly trimmed boxwoods creates a crisp, defined pattern that feels both timeless and luxurious. Within each framed section, you can plant vibrant blooms such as tulips, lavender, or roses for seasonal variety. The green framework provides a sense of order, while the bursts of color inside each section keep it lively and captivating. This design is perfect for a formal courtyard or the front approach of a luxury home.


2. Herb-Filled French Knot Design

For a practical yet elegant twist, you can create a French knot garden filled with aromatic herbs like thyme, rosemary, sage, and lavender. The intertwining pattern of the hedges, combined with fragrant herbs, provides a sensory experience that delights both the eyes and nose. This design is not only visually stunning but also functional, as the herbs can be harvested for cooking. Ideal for small spaces or as a kitchen garden, this idea marries elegance with everyday utility.


3. Floral Knot Garden with Seasonal Blooms

A floral French knot garden takes the concept to a more vibrant level by featuring seasonal flowers in its sections. Imagine tulips and daffodils in spring, roses and lilies in summer, and chrysanthemums in fall, all framed by evergreen hedges. The changing palette creates a living artwork that evolves throughout the year. This design works beautifully in a central garden space, drawing attention as a living masterpiece that highlights the elegance of each season.


4. Gravel-Path Knot Garden

Adding gravel paths between knot garden sections elevates the design into a truly refined layout. The gravel provides contrast to the greenery while enhancing symmetry and accessibility. You can create a central focal point—such as a fountain, sundial, or stone sculpture—surrounded by the knot design. The combination of pathways, structured hedges, and vibrant blooms creates a stately elegance perfect for larger properties or gardens meant to impress guests.


5. Romantic Rose Knot Garden

Roses are the epitome of romance, and incorporating them into a French knot design enhances the garden’s charm and sophistication. Low hedges can be used to create the knot framework, while different colored roses fill each section. Add climbing roses on trellises around the perimeter to complete the romantic feel. This design works especially well in front of patios, terraces, or as a centerpiece in a luxury estate garden, offering an enchanting and fragrant escape.


A French knot garden flower bed is not just about planting—it’s about sculpting the landscape into a living tapestry of elegance. By combining structured hedges, seasonal flowers, and thoughtful layouts, you can bring timeless French sophistication right into your outdoor space.

5 Stunning Yellow-Themed Flower Beds for a Bright Garden Glow

5 Stunning Yellow-Themed Flower Beds for a Bright Garden Glow

A yellow-themed flower bed is like a burst of sunshine right in your garden. Yellow flowers bring warmth, optimism, and cheerfulness, making them a favorite for creating a lively outdoor space. Whether you want a bold focal point, a soft glow in the evening, or a bright seasonal bed, yellow flowers can do it all. Here are five stunning yellow-themed flower bed ideas that will give your garden a glowing, radiant charm.


1. Sunny Marigold Borders

Marigolds are one of the best flowers to create a glowing yellow-themed flower bed. Planting marigolds in neat borders or rows gives your garden a structured yet radiant look. Their golden-yellow and orange tones brighten pathways, driveways, or the front of flower beds. They are also low-maintenance, bloom generously, and deter pests naturally, making them practical as well as beautiful. Pairing them with green foliage plants enhances the vibrancy of their golden blooms for a cheerful, sun-kissed garden design.


2. Golden Sunflower Corners

Nothing says “bright garden glow” like sunflowers. These tall, sunny blooms make an excellent choice for corner flower beds where they can tower proudly and create a natural focal point. Their bold yellow petals radiate warmth and instantly uplift the entire outdoor space. You can plant dwarf sunflowers for smaller spaces or taller varieties for a dramatic display. Combined with rustic wooden fences or garden pathways, sunflower beds bring a classic countryside charm while filling your garden with golden brilliance.


3. Cheerful Daffodil Clusters

Daffodils are iconic spring flowers that bring instant brightness to your garden. Planting clusters of daffodils in flower beds creates waves of golden-yellow that feel both refreshing and elegant. Their trumpet-shaped blooms add a unique design element, while their vibrant hues pair beautifully with white or soft pastel flowers. Daffodils are perennial, so they return every spring, ensuring your garden glows with sunshine year after year. They are especially stunning in circular or layered flower bed arrangements.


4. Glowing Coreopsis Beds

Coreopsis, often called “tickseed,” is a delightful yellow flower that blooms all summer long. Planting them in dense flower beds creates a glowing carpet of sunshine in your garden. Their star-like blooms are small but abundant, giving your garden a cheerful, meadow-inspired look. Coreopsis pairs beautifully with ornamental grasses and purple flowers for a stunning contrast. These low-maintenance perennials are ideal if you want a long-lasting yellow glow with minimal upkeep, perfect for both cottage-style and modern gardens.


5. Golden Rose Elegance

Yellow roses bring elegance, romance, and cheer to any flower bed. A yellow rose-themed flower bed can serve as a bold statement piece in your garden, offering both sophistication and warmth. The deep golden to soft buttery shades of yellow roses provide layers of visual depth, making your garden look vibrant and graceful. Planting them in raised beds or around seating areas creates a bright, fragrant, and inviting atmosphere. They also pair beautifully with white or cream blooms for a classic glow.


Conclusion
Yellow-themed flower beds radiate joy, positivity, and brightness, transforming your garden into a glowing retreat. From sunny marigolds and towering sunflowers to elegant roses and cheerful daffodils, yellow flowers bring unmatched vibrancy and warmth. Whether you want a bold focal point or a soft golden glow, these five stunning ideas will help you design a garden that shines with timeless beauty.

5 Gorgeous Pink-Themed Flower Beds for a Romantic Design

5 Gorgeous Pink-Themed Flower Beds for a Romantic Design

A pink-themed flower bed instantly transforms any garden into a dreamy, romantic escape. Soft blush tones evoke serenity, while bold pink shades add vibrancy and life. Whether you prefer cottage-style charm or modern elegance, pink flowers create a delicate yet striking atmosphere in outdoor spaces. From pastel roses to vibrant petunias, designing with pink brings warmth and beauty that feels both inviting and timeless. Here are five gorgeous pink-themed flower bed ideas that will help you achieve the perfect romantic garden design.


1. Pastel Pink Rose Garden Bed

Nothing says romance like roses, and a pastel pink rose bed is the ultimate symbol of elegance. Choose classic varieties such as ‘Queen Elizabeth’ or ‘New Dawn’ for their delicate hues and intoxicating fragrance. Arrange them in layered rows with a mix of soft greenery like dusty miller or lamb’s ear for contrast. This design creates a fairy-tale feel, perfect for entryways, pathways, or centerpieces. Pastel pink roses also bloom repeatedly through the season, ensuring your garden maintains its romantic glow.


2. Bold Pink Petunia and Geranium Bed

For those who want lively movement and vibrancy, combining hot pink petunias with geraniums creates a dazzling flower bed. These flowers spill gracefully over borders and containers, giving a lush, overflowing look. Their continuous summer blooms make them perfect for brightening patios, driveways, or sunny corners of your garden. Pair them with white alyssum or purple salvia to balance the richness of the pinks. This style delivers a vibrant yet romantic theme that feels cheerful and full of energy.


3. Peony Paradise Bed

Peonies are adored for their lush, layered blooms that come in dreamy shades of pink. A bed filled with pink peonies creates an enchanting, soft, and luxurious atmosphere. They pair beautifully with irises, delphiniums, or lavender for added color depth and height contrast. Best planted in spring, peonies return year after year, making them a long-lasting romantic addition. Their fragrant blossoms and full blooms give the garden a bridal-like charm, perfect for creating a sophisticated, pink-centered flower bed.


4. Mixed Pink Tulip Bed for Spring Charm

If you want a seasonal burst of romance, a mixed tulip flower bed in shades of pink is ideal for spring. From blush to deep magenta, tulips offer endless variety to create striking patterns. Plant them in clusters or waves for maximum effect. Pairing them with white daffodils or purple hyacinths enhances their vibrancy. As one of the first blooms after winter, pink tulips create a sense of joy and renewal, bringing fresh romance to your outdoor space.


5. Romantic Pink Wildflower Meadow Bed

For a more natural and whimsical design, consider a wildflower-inspired pink-themed bed. Include pink coneflowers, cosmos, zinnias, and hollyhocks for a delightful, carefree look. These flowers attract pollinators, adding life and movement while maintaining a charmingly rustic feel. Mixing various shades of pink with soft whites and purples ensures a dynamic yet cohesive palette. This style is perfect for large garden spaces or areas where you want to encourage a relaxed, free-flowing, romantic vibe.


Conclusion: A pink-themed flower bed is more than just a garden design—it’s a statement of romance, beauty, and warmth. Whether you prefer structured elegance with roses or free-spirited charm with wildflowers, pink blooms add softness and vibrancy that will enchant anyone who visits your garden.

5 Beautiful Blue-Themed Flower Beds for a Unique Garden Vibe

5 Beautiful Blue-Themed Flower Beds for a Unique Garden Vibe

A blue-themed flower bed brings a serene, refreshing, and unique touch to any garden. Blue is a rare yet captivating color in nature, symbolizing calmness and tranquility, and incorporating it into your flower beds can make your outdoor space stand out. From soft pastel shades to deep, rich blues, the combinations create an enchanting atmosphere that feels peaceful and elegant. Here are five beautiful blue-themed flower bed ideas that will transform your garden into a soothing retreat.


1. Classic Blue Delphinium Bed

Delphiniums are among the most striking blue flowers, with tall spires that add height and elegance to any garden. Planting them in clusters creates a dramatic effect, especially when paired with green foliage or white accents. This bed works beautifully as a backdrop along fences or walls, bringing both vertical interest and vibrant color. Their deep cobalt and sky-blue tones instantly draw the eye, making them perfect for adding a regal touch to your garden design.


2. Romantic Blue Hydrangea Bed

Hydrangeas are beloved for their large, lush clusters of blooms, and when nurtured to display their stunning blue hues, they create a dreamy, romantic vibe. A bed filled with blue hydrangeas feels soft and inviting, especially around patios, garden paths, or sitting areas. They thrive in partially shaded areas, making them versatile for different garden layouts. Combining them with hostas or ferns enhances the texture while keeping the blue blossoms as the focal point.


3. Calming Lavender and Blue Salvia Bed

For a fragrant and visually appealing design, combine lavender with blue salvia in your flower bed. This pairing brings together soothing aromas with waves of calming blue and purple-blue tones, making it a perfect choice for meditation corners or relaxation spots. Lavender offers a soft, cottage-garden charm, while salvia adds depth with its upright blooms. Together, they create a pollinator-friendly haven that looks stunning and invites bees and butterflies into your garden.


4. Striking Blue Iris Bed

Blue irises are symbols of elegance and sophistication, with their sword-like leaves and bold blossoms. Planting a bed dedicated to irises adds structure and beauty, especially when arranged near water features or stone pathways. Their rich sapphire tones look striking against a background of greenery, while their unique petal shapes bring artistic flair to the landscape. For a layered look, combine them with ornamental grasses or smaller blue flowers like forget-me-nots.


5. Whimsical Forget-Me-Not Bed

For a ground-covering effect filled with charm, forget-me-nots are a perfect choice. These delicate, sky-blue flowers create a carpet-like effect that softens pathways, borders, and shady garden corners. When planted in abundance, they bring a whimsical, fairy-tale vibe to the garden. Pair them with white daisies or soft pinks for contrast while keeping blue as the dominant theme. Forget-me-nots also reseed naturally, ensuring your blue-themed bed continues to flourish year after year.


A blue-themed flower bed is not only rare and eye-catching but also deeply soothing, giving your outdoor space a refreshing and peaceful personality. By choosing the right flowers and arranging them thoughtfully, you can create a garden that feels both unique and timeless.

5 Gorgeous Red-Themed Flower Beds for a Bold Outdoor Look

5 Gorgeous Red-Themed Flower Beds for a Bold Outdoor Look

Red is a color of passion, energy, and strength, making it a stunning choice for a flower bed theme. A red-themed garden instantly creates a bold, dramatic atmosphere and draws the eye with its fiery charm. From roses to geraniums, the possibilities are endless when curating a bed of rich, red blooms. Below are five gorgeous red-themed flower bed ideas to help you design a vibrant, powerful, and unforgettable garden space.


1. Romantic Rose Bed

Roses are timeless symbols of love and elegance, making them the perfect centerpiece for a red-themed flower bed. Plant deep crimson roses alongside scarlet climbing varieties to add layers of texture and depth. You can design the bed in a formal style with neat borders, or let climbing roses trail along trellises for a more natural look. Paired with lush green foliage, red roses create an enchanting space that feels both romantic and sophisticated, perfect for front yards, patios, or special corners of your garden.


2. Fiery Geranium and Petunia Mix

For a lively, low-maintenance red flower bed, combining geraniums and petunias works wonders. Geraniums bring structured, bold blooms while petunias spread gracefully with their bright trumpet-shaped flowers. This combination creates a striking carpet of red that looks beautiful in borders or raised beds. Both flowers are sun-loving and long-blooming, ensuring a continuous display of vibrant color throughout summer. Adding white or pink accents among them can make the reds pop even more, giving your garden a cheerful, dynamic appeal.


3. Dramatic Dahlia and Zinnia Display

Dahlias and zinnias are known for their striking, full-bodied blooms that come in a variety of red shades—from ruby to deep burgundy. Creating a mixed bed with these flowers adds dramatic flair and bold textures to your garden. Dahlias, with their intricate petals, pair beautifully with the simplicity of zinnias, creating a bed that is eye-catching and full of character. These flowers thrive in sunny areas and bloom for months, offering a continuous burst of fiery color that makes your garden unforgettable.


4. Bold Tropical-Inspired Bed

If you want a more exotic look, consider creating a red-themed tropical-inspired flower bed. Incorporate red hibiscus, canna lilies, and crocosmia to bring a lush, vibrant atmosphere. These bold flowers not only offer striking red hues but also dramatic foliage and unique shapes that stand out. The combination creates a garden bed reminiscent of tropical paradises, adding energy and flair. Perfect for poolside spaces or sunny garden corners, this idea turns your outdoor area into a bold and fiery escape.


5. Classic Tulip and Poppy Bed

Tulips and poppies are iconic red blooms that exude charm and elegance. A bed filled with tulips in spring followed by vibrant red poppies in summer ensures a long season of striking color. Their simple yet bold forms create a timeless garden style that appeals to anyone who loves classic floral beauty. Planting them in groups makes the red hues even more impactful, especially when surrounded by green lawns or hedges. This bed is perfect for creating a bold outdoor statement that feels both graceful and dramatic.


A red-themed flower bed is not just about color—it’s about creating a bold, passionate, and energetic atmosphere in your garden. Whether you go for classic roses, tropical hibiscus, or vibrant zinnias, these designs will make your outdoor space truly unforgettable.